To successfully make a single payment using Online Account, go to Payments > Send Payment. It will lead you to the Send Funds page, where you specify the payment source account and recipient (beneficiary).
Prerequisites
A beneficiary must already have been created in order to make a payment. If you are paying them for the first time, you will need to create the beneficiary first. Read more about how to do that in the section “Creating a Beneficiary“.
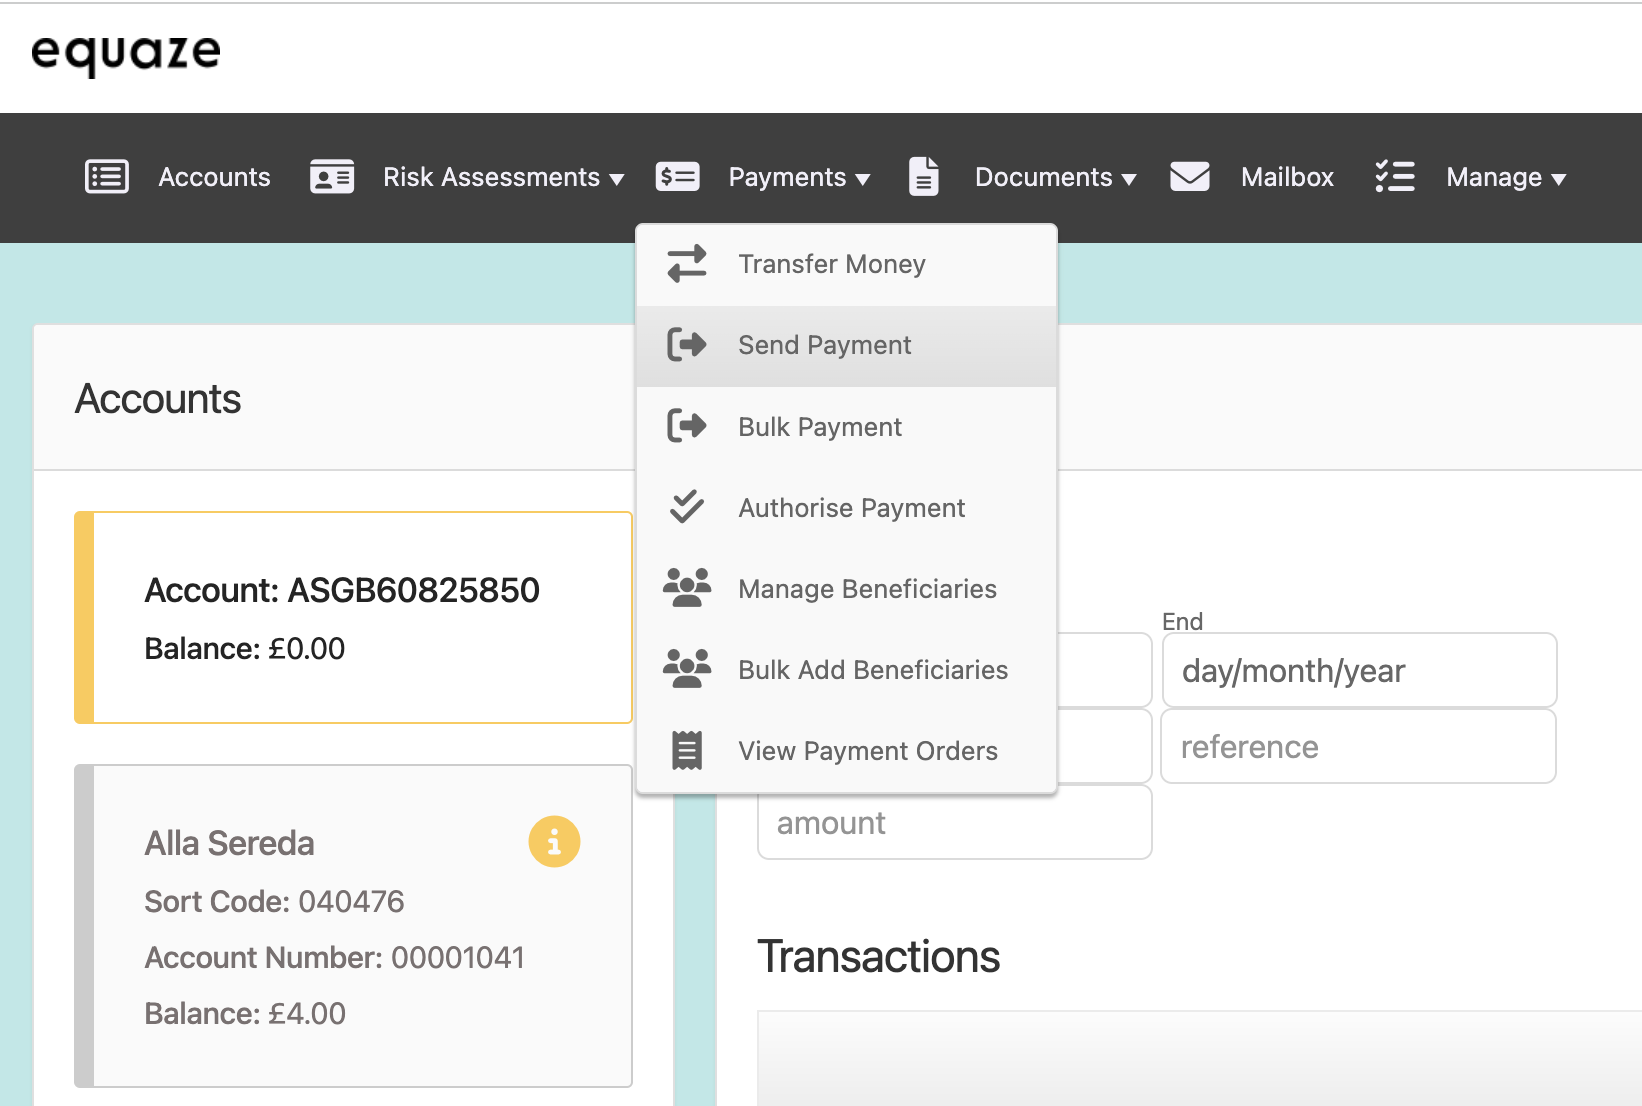
Choosing an Account and a Beneficiary
On the Send Funds page, select an account as the payment source. This is the account used to make the payment. Each account has its own beneficiaries.
You can use the “Add Beneficiary” button to create a new beneficiary. You can also use the “Link Beneficiary” button to link a beneficiary from one of your accounts to another one, to save you entering the beneficiary details again.
Select the beneficiary you wish to pay from the drop down list. You can also start typing the beneficiary’s name to filter the list.
Next, click Continue to move to the next step of the process.
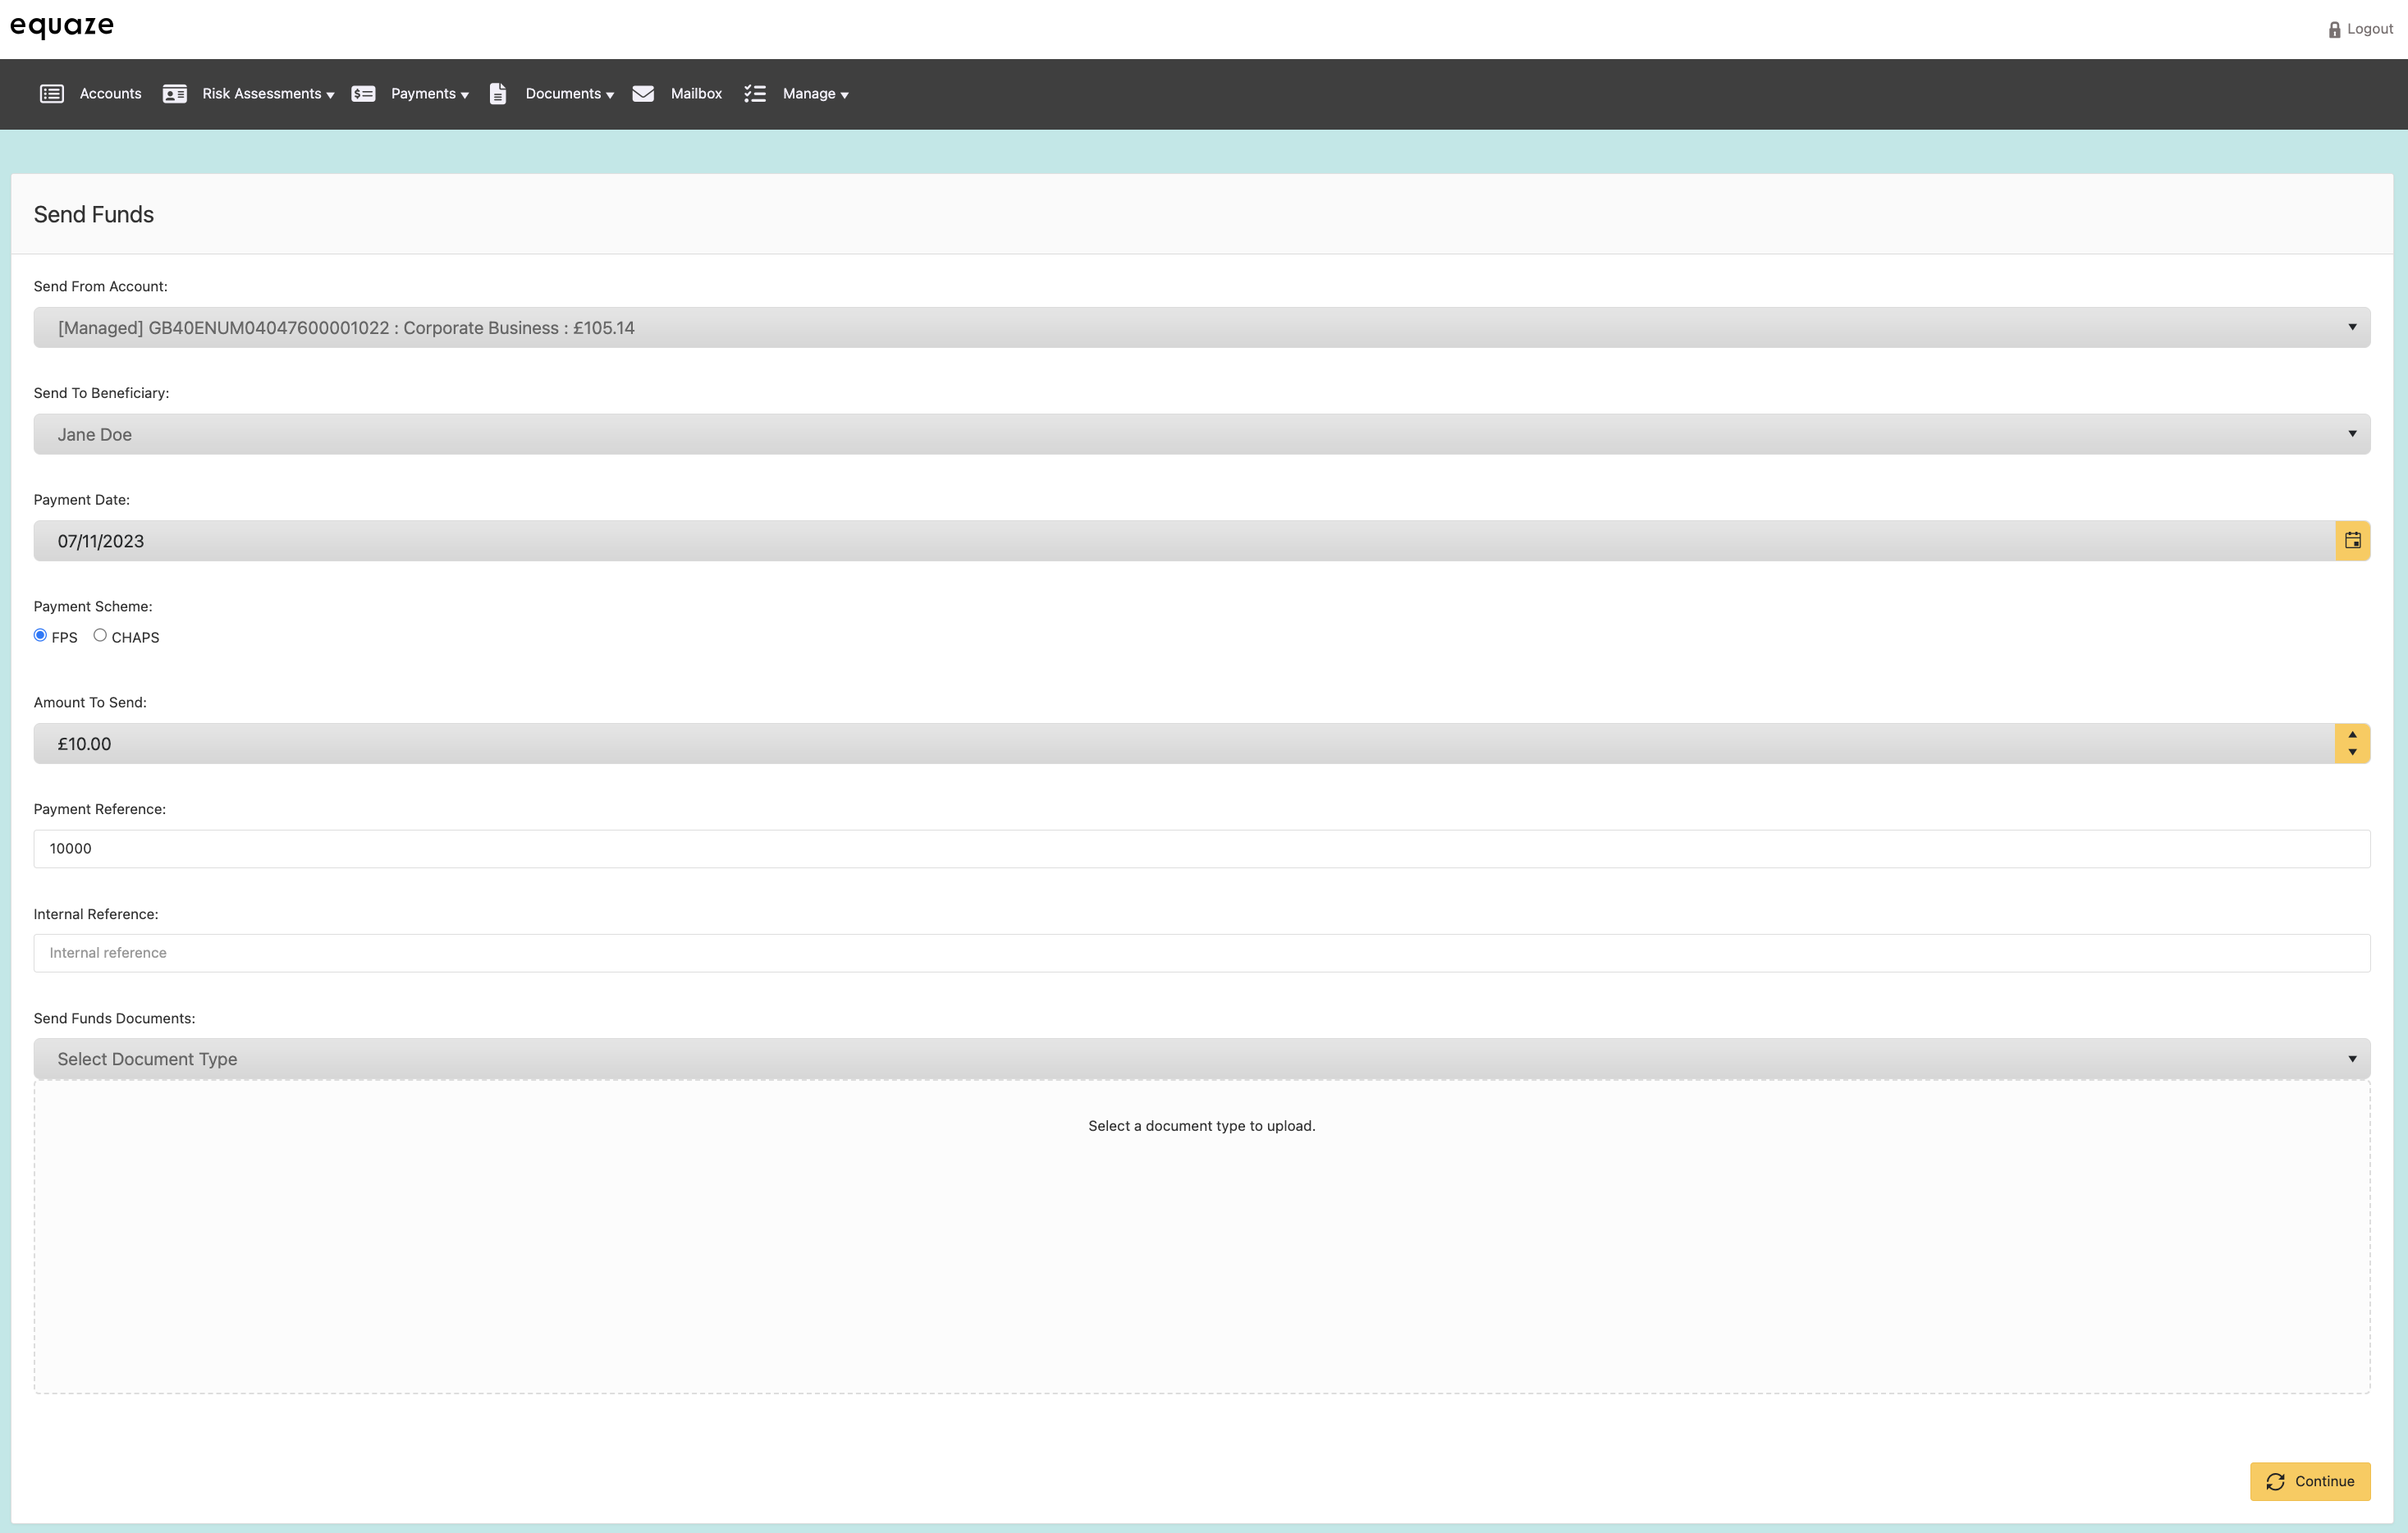
Providing the Payment Details
The next step is to provide more details about the payment. Choose the payment date, scheme, and the amount of money you need to pay. Also, add a reference or a description to note the request and upload any documents if we have requested you to do so. Once done, click Continue.
Reviewing and sending your payment
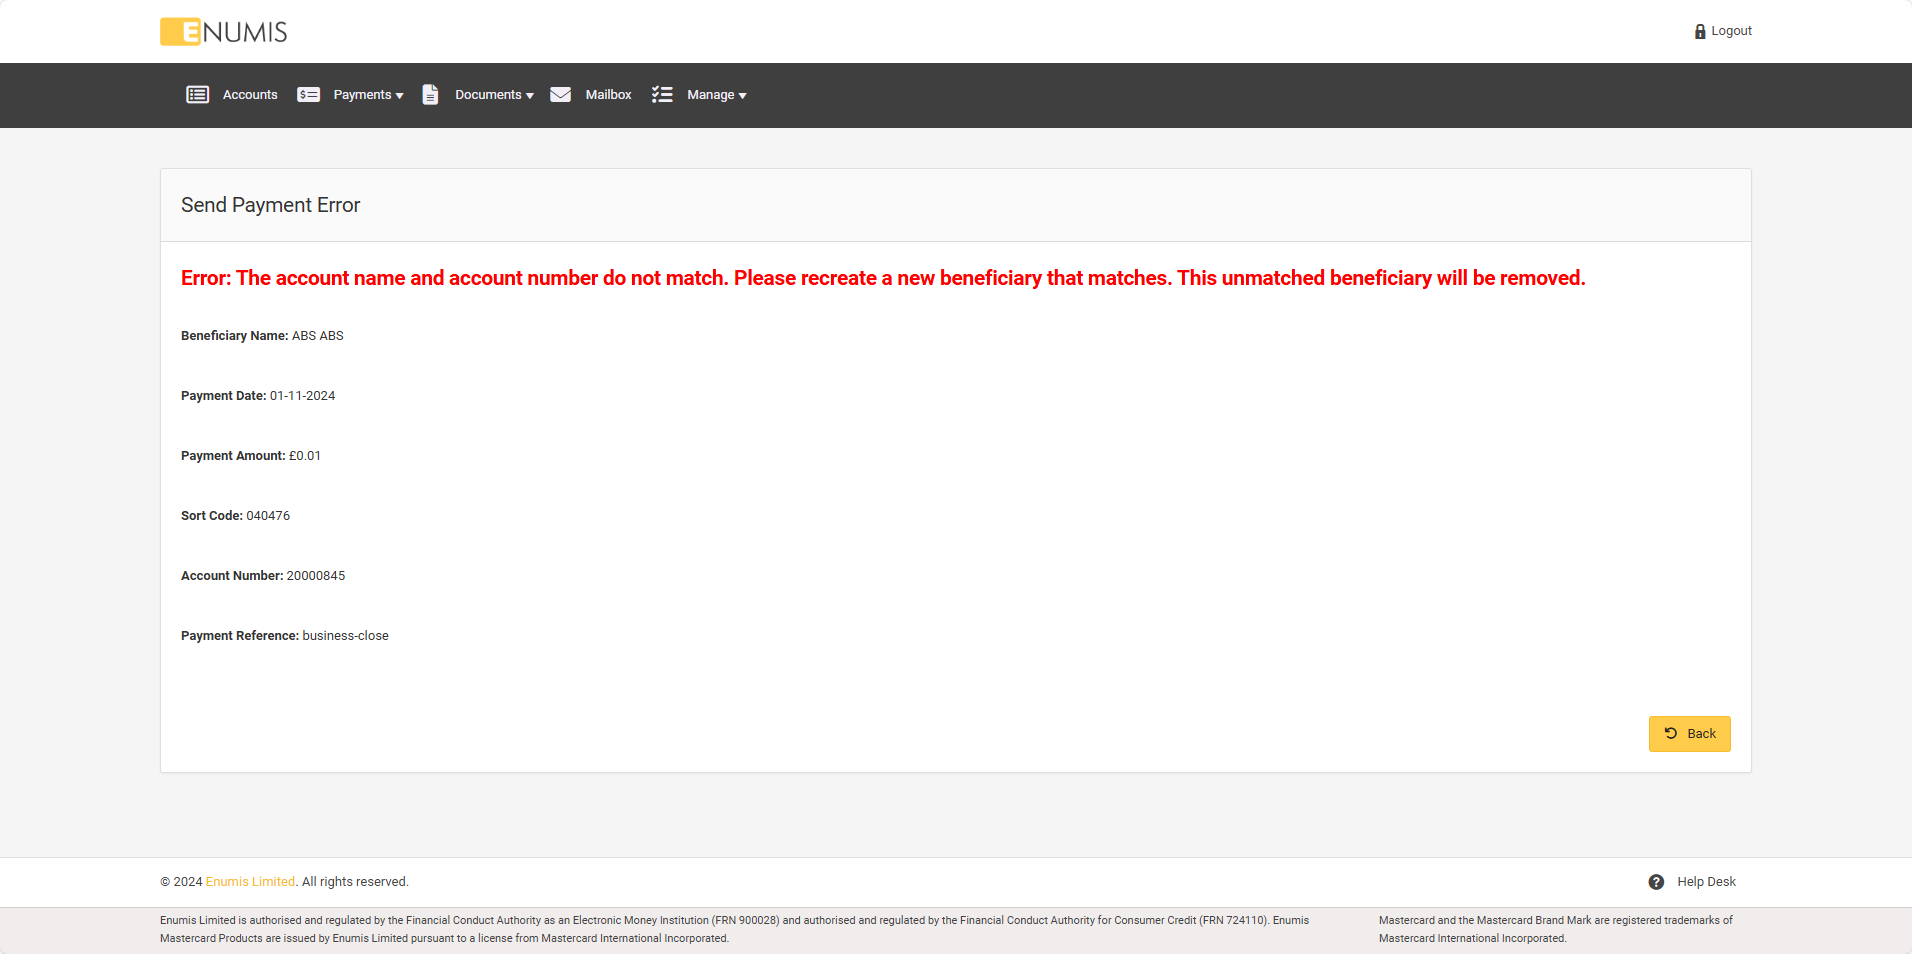
The transaction will be stopped:
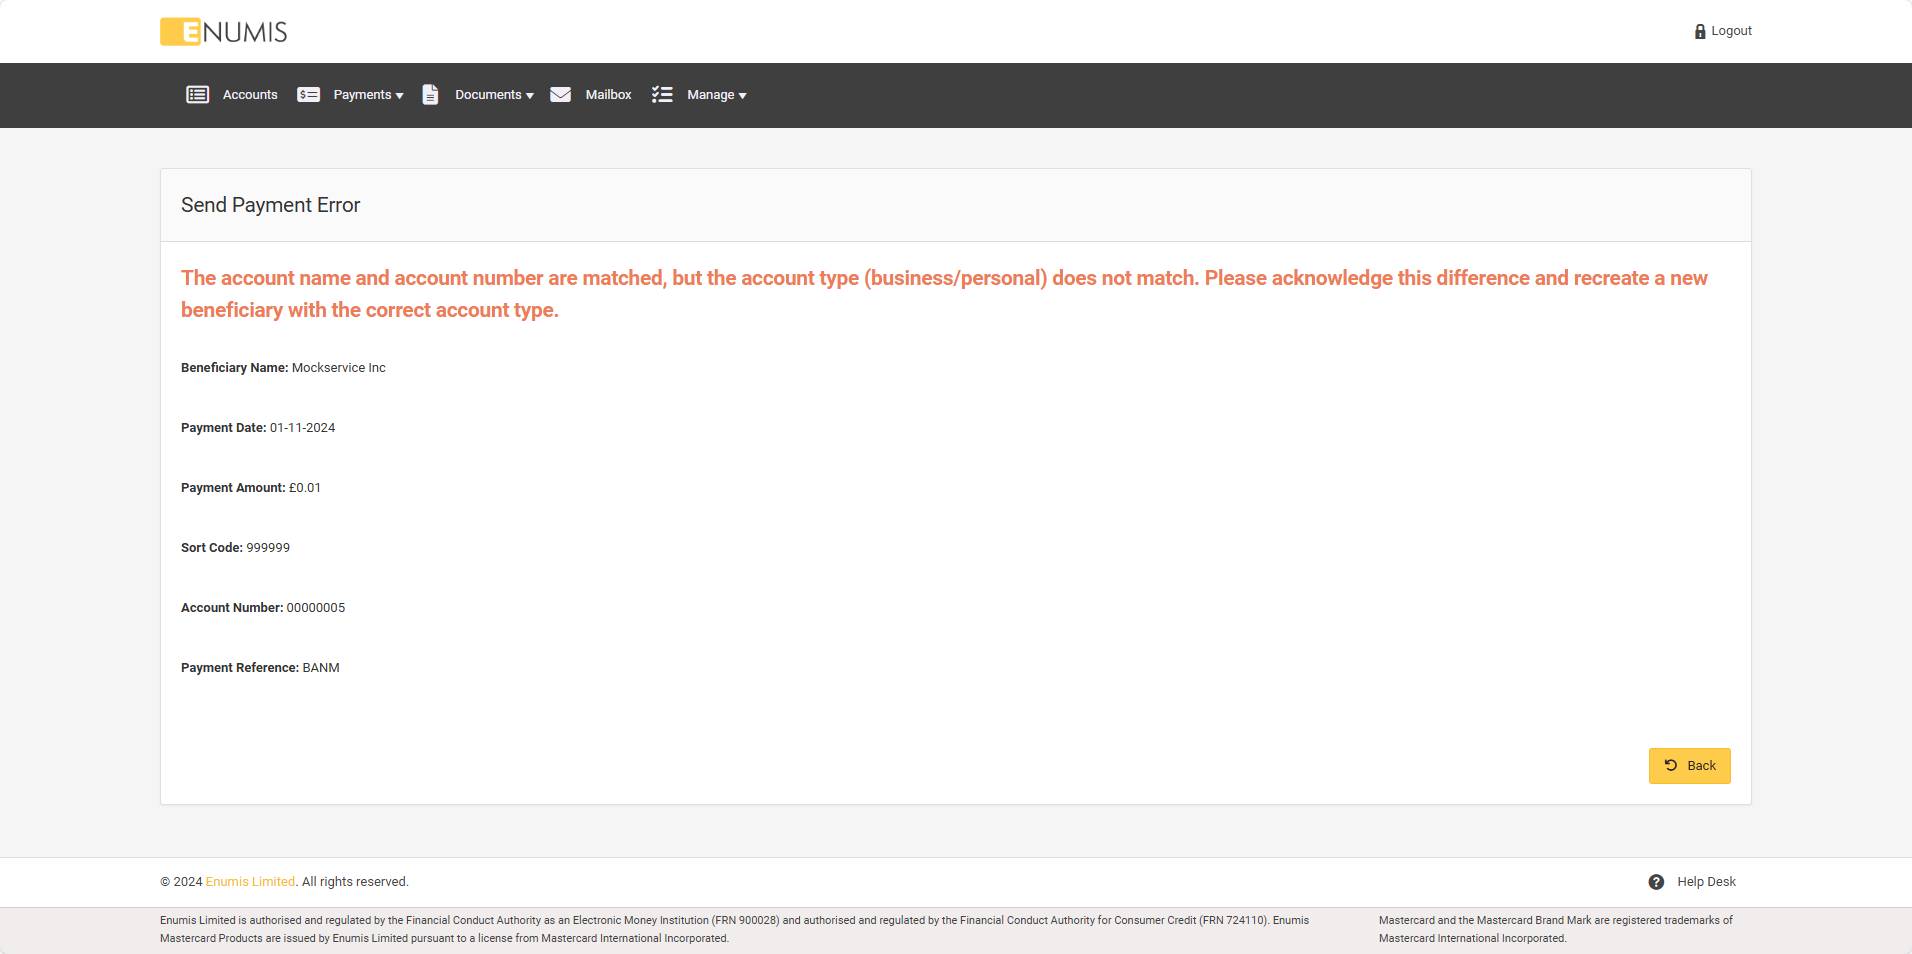
- If your beneficiary is a not match:
- If your beneficiary is a match, however the beneficiary type is not correct:
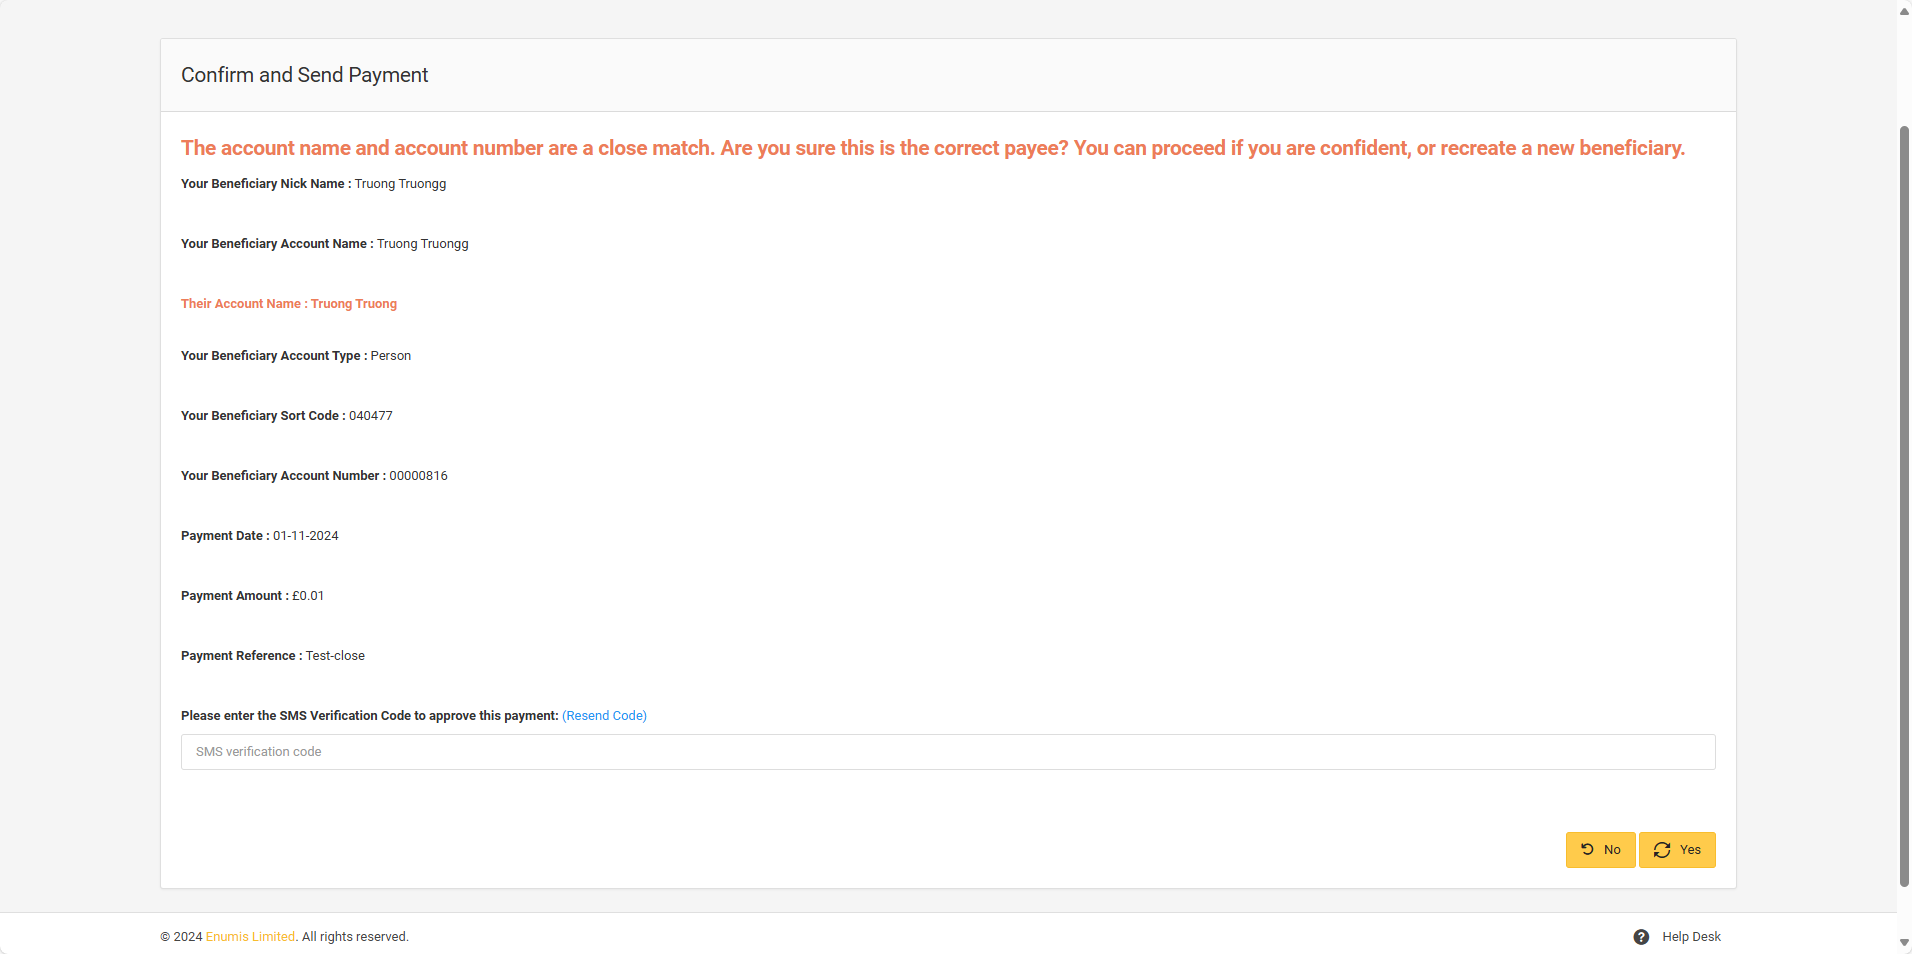
If your beneficiary is a close match, you can continue or cancel your transaction:
If your beneficiary is a match, you can continue your transaction
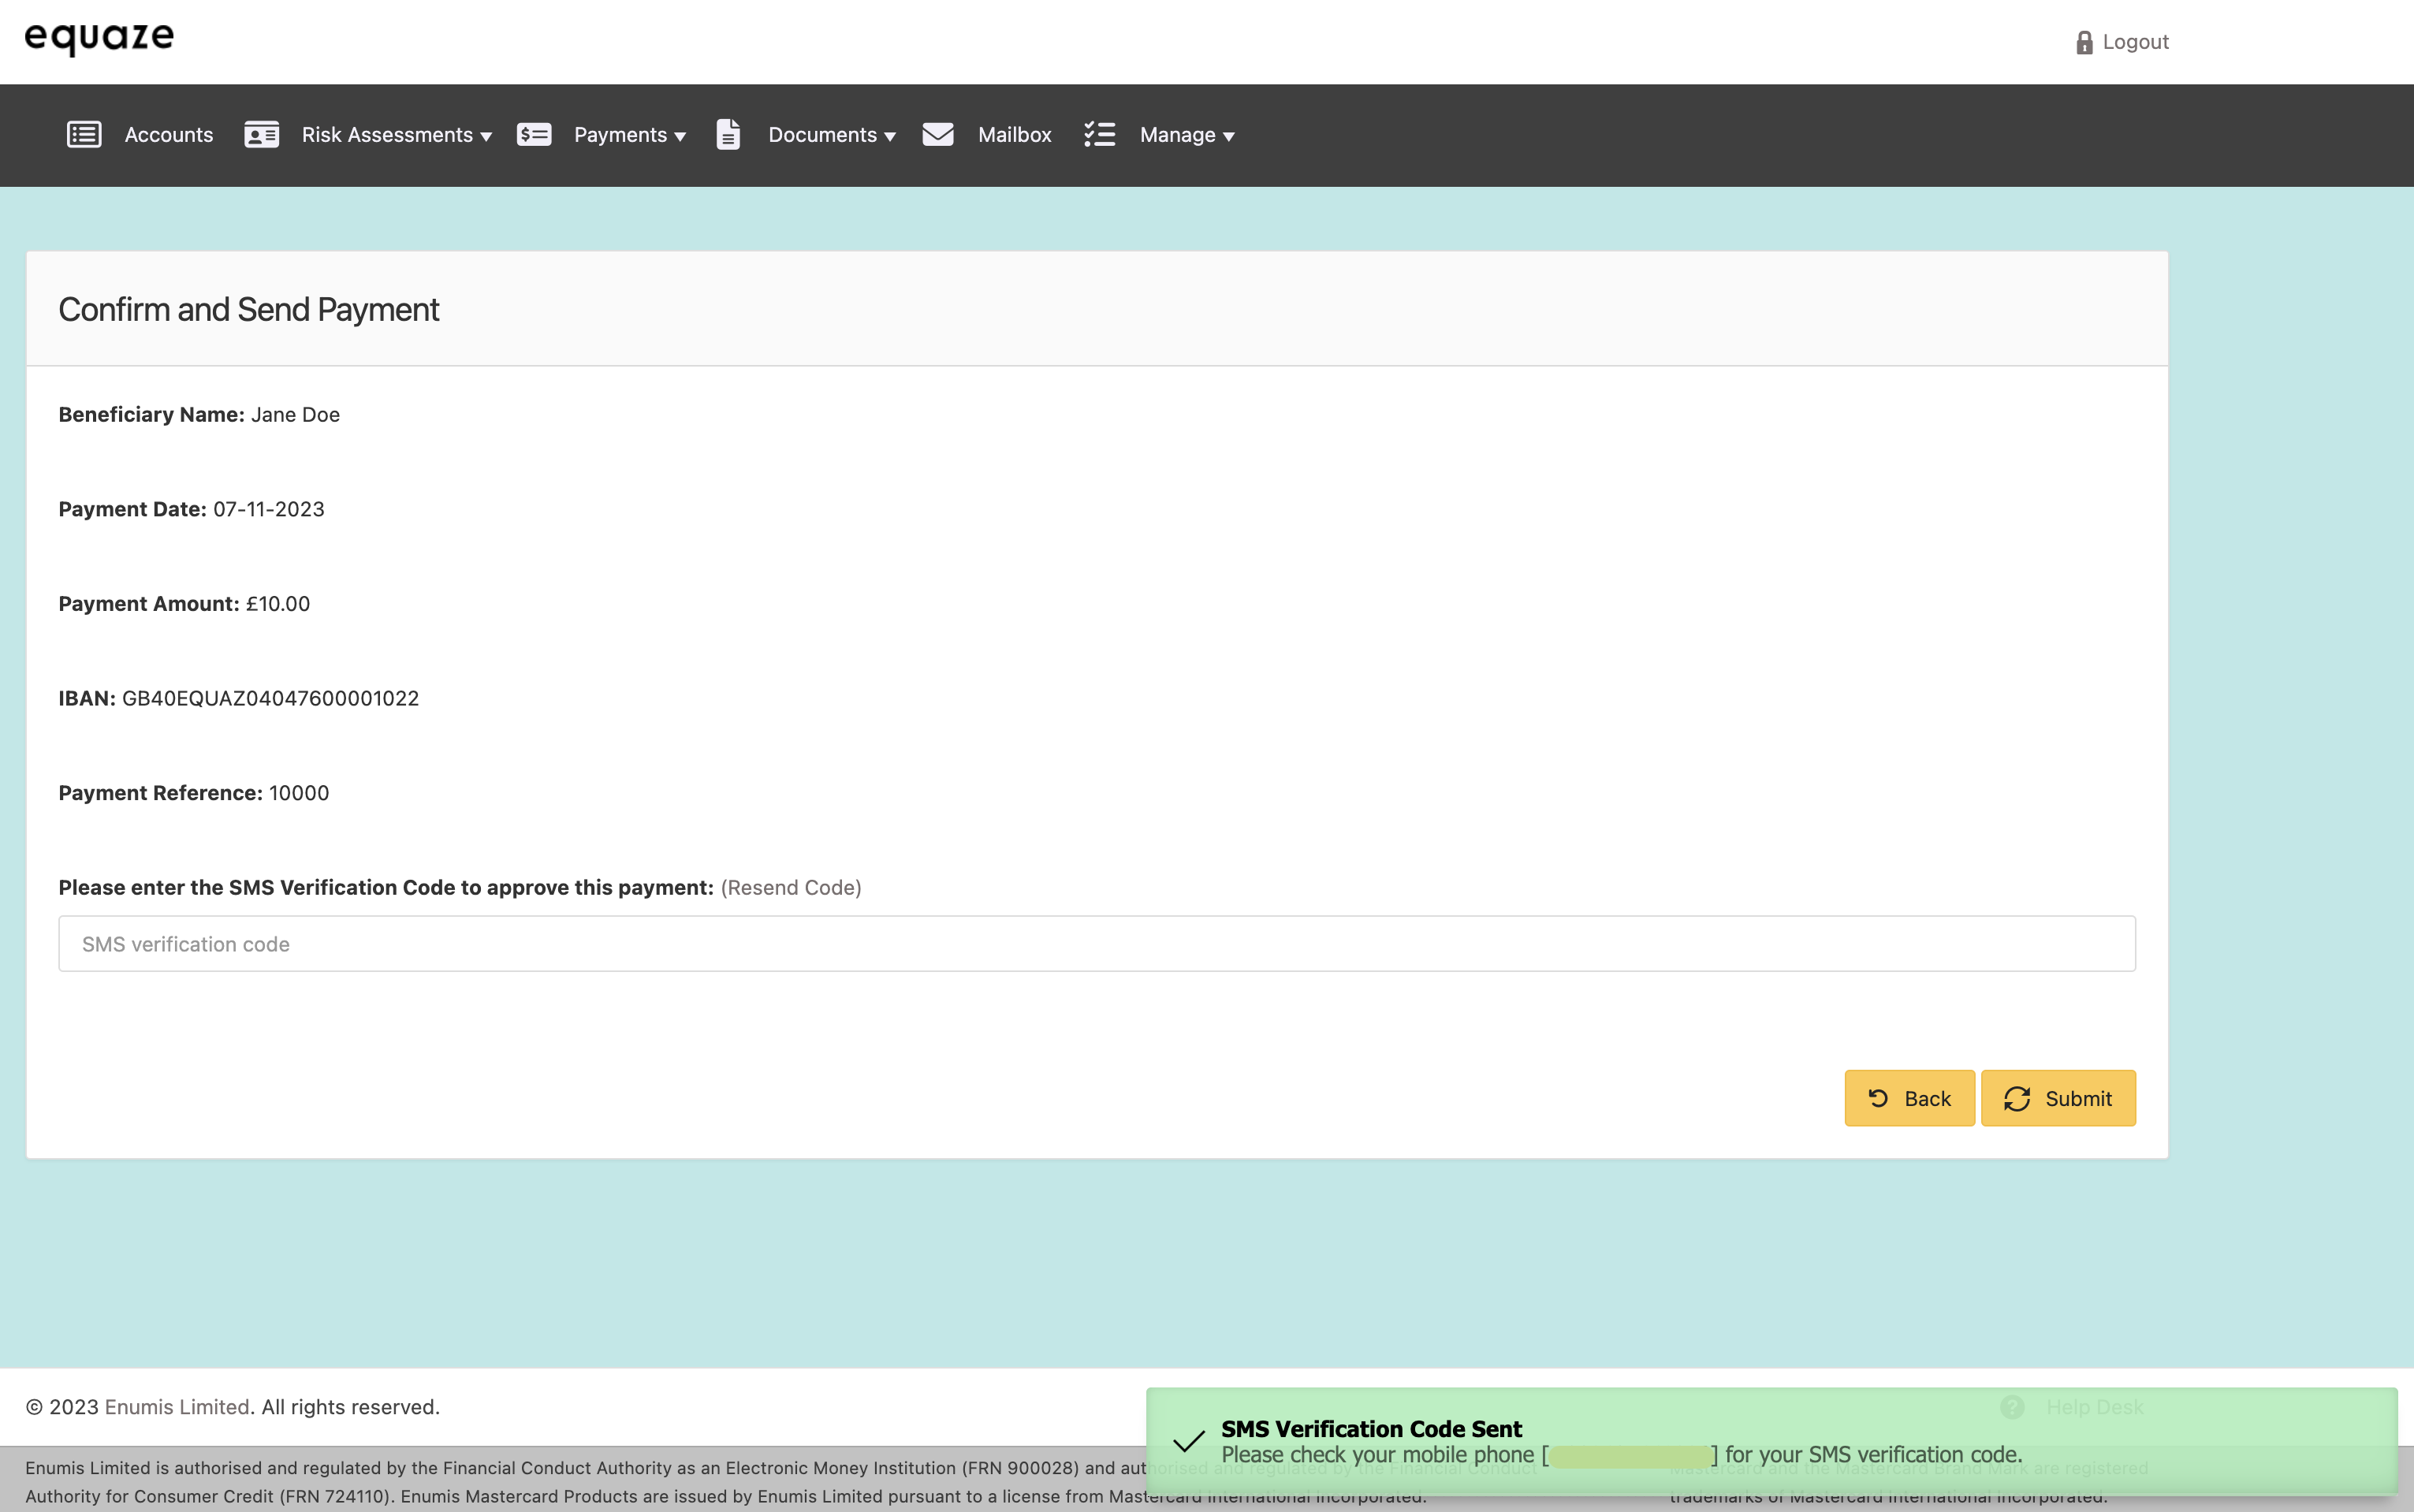
On the Confirm and Send Payment page, you need to review the details you provided before sending the payment. At the same time, an SMS verification code is sent to your mobile phone, which you must enter if you decide to confirm the request.
If you notice that all the details are not correct, you can return to the previous page and make corrections to the payment details, click Back. Note that if you notice beneficiary details are incorrect, you will need to delete the beneficiary and create a replacement.
To confirm your payment request, enter your SMS verification code in the input field and click Submit.
Understanding the UI feedback and next steps
Once you confirm your payment request, our system will begin to process it. We perform some checks before sending the funds. This approach covers both same-day and future payment requests. How the Online Account user interface (UI) provides feedback after you confirm your payment request depends on your user type.
As a Sole Authority User
If you are a sole authority user, the Send Funds Status page appears after your payment request confirmation. The page details what our system does in the background and shows a small notification box for feedback about the successful operation.
Note: As a sole authority user, your payment request does not need approval, and our system schedules it after payment confirmation.
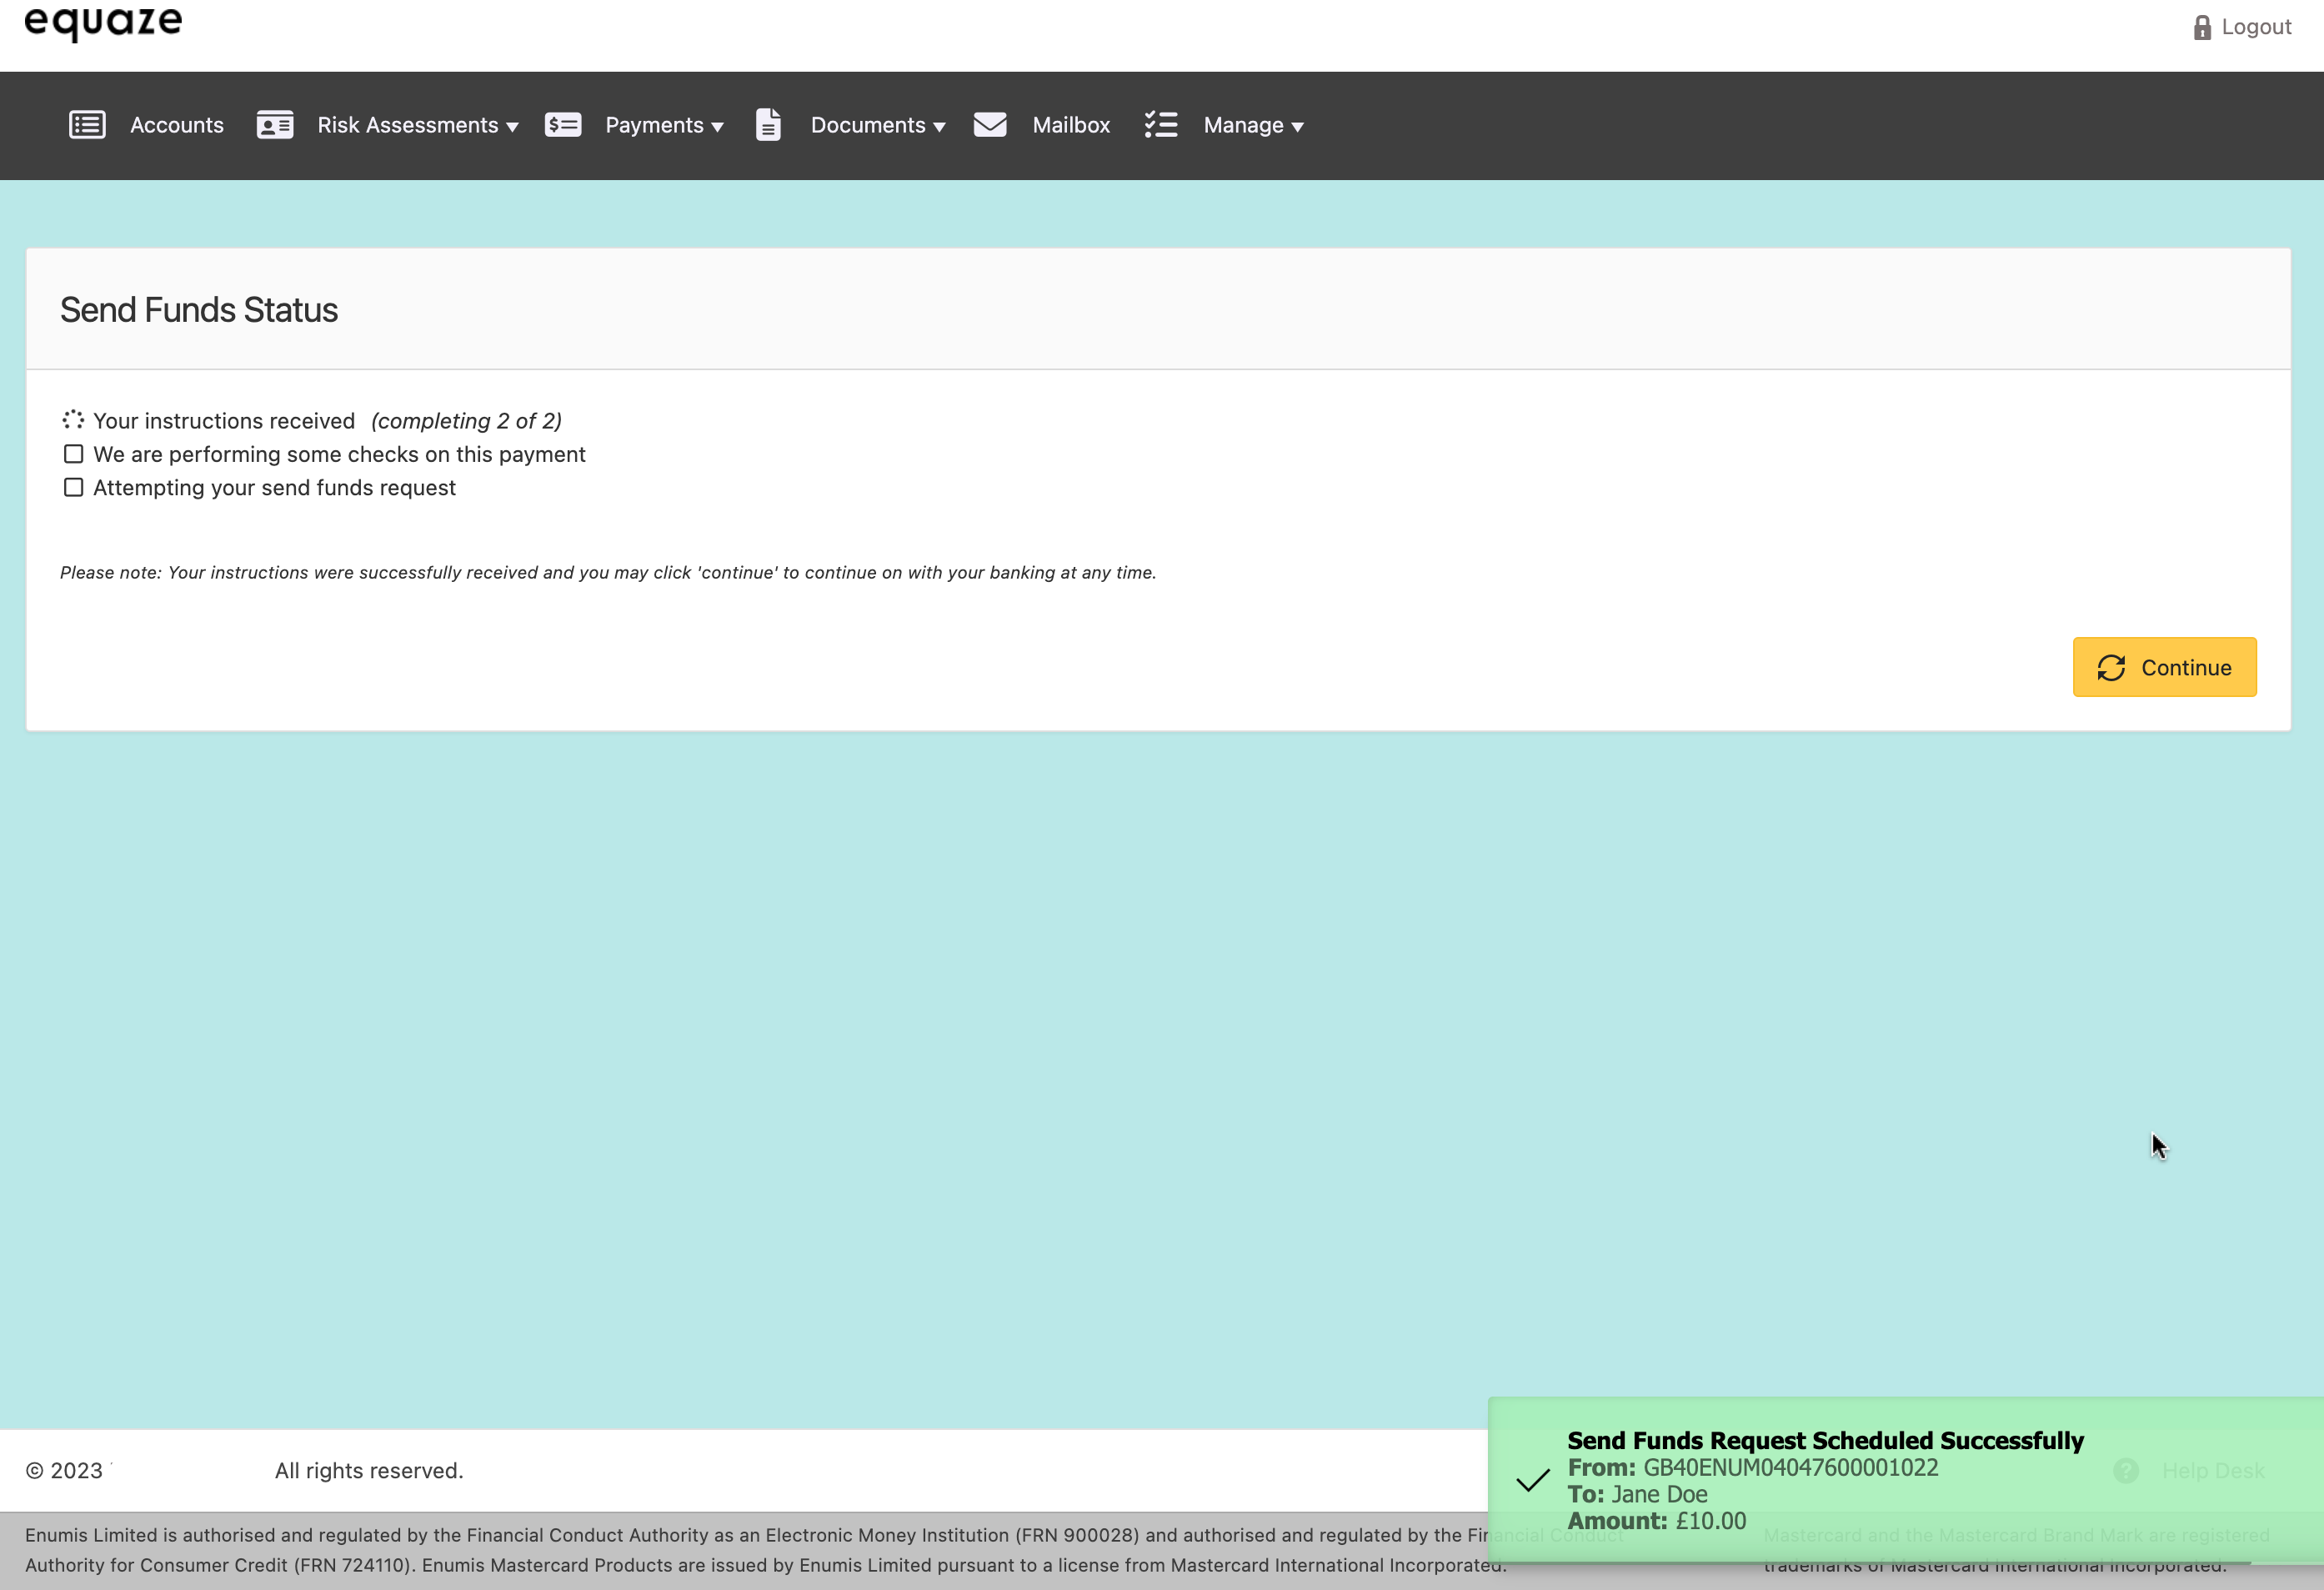
Lastly, the Continue button, if clicked, redirects you back to the Accounts page.
As a Non-sole Authority User
If you do not have sole authority permissions on the account being used to make the payment, the Accounts page appears after your payment request confirmation. A small notification box about the successful operation also appears.
As a non-sole authority user, your payment request is still pending in our system. A user with authorised permissions must first approve the request before our system processes it. Note that you are unable to authorise your payment request.


