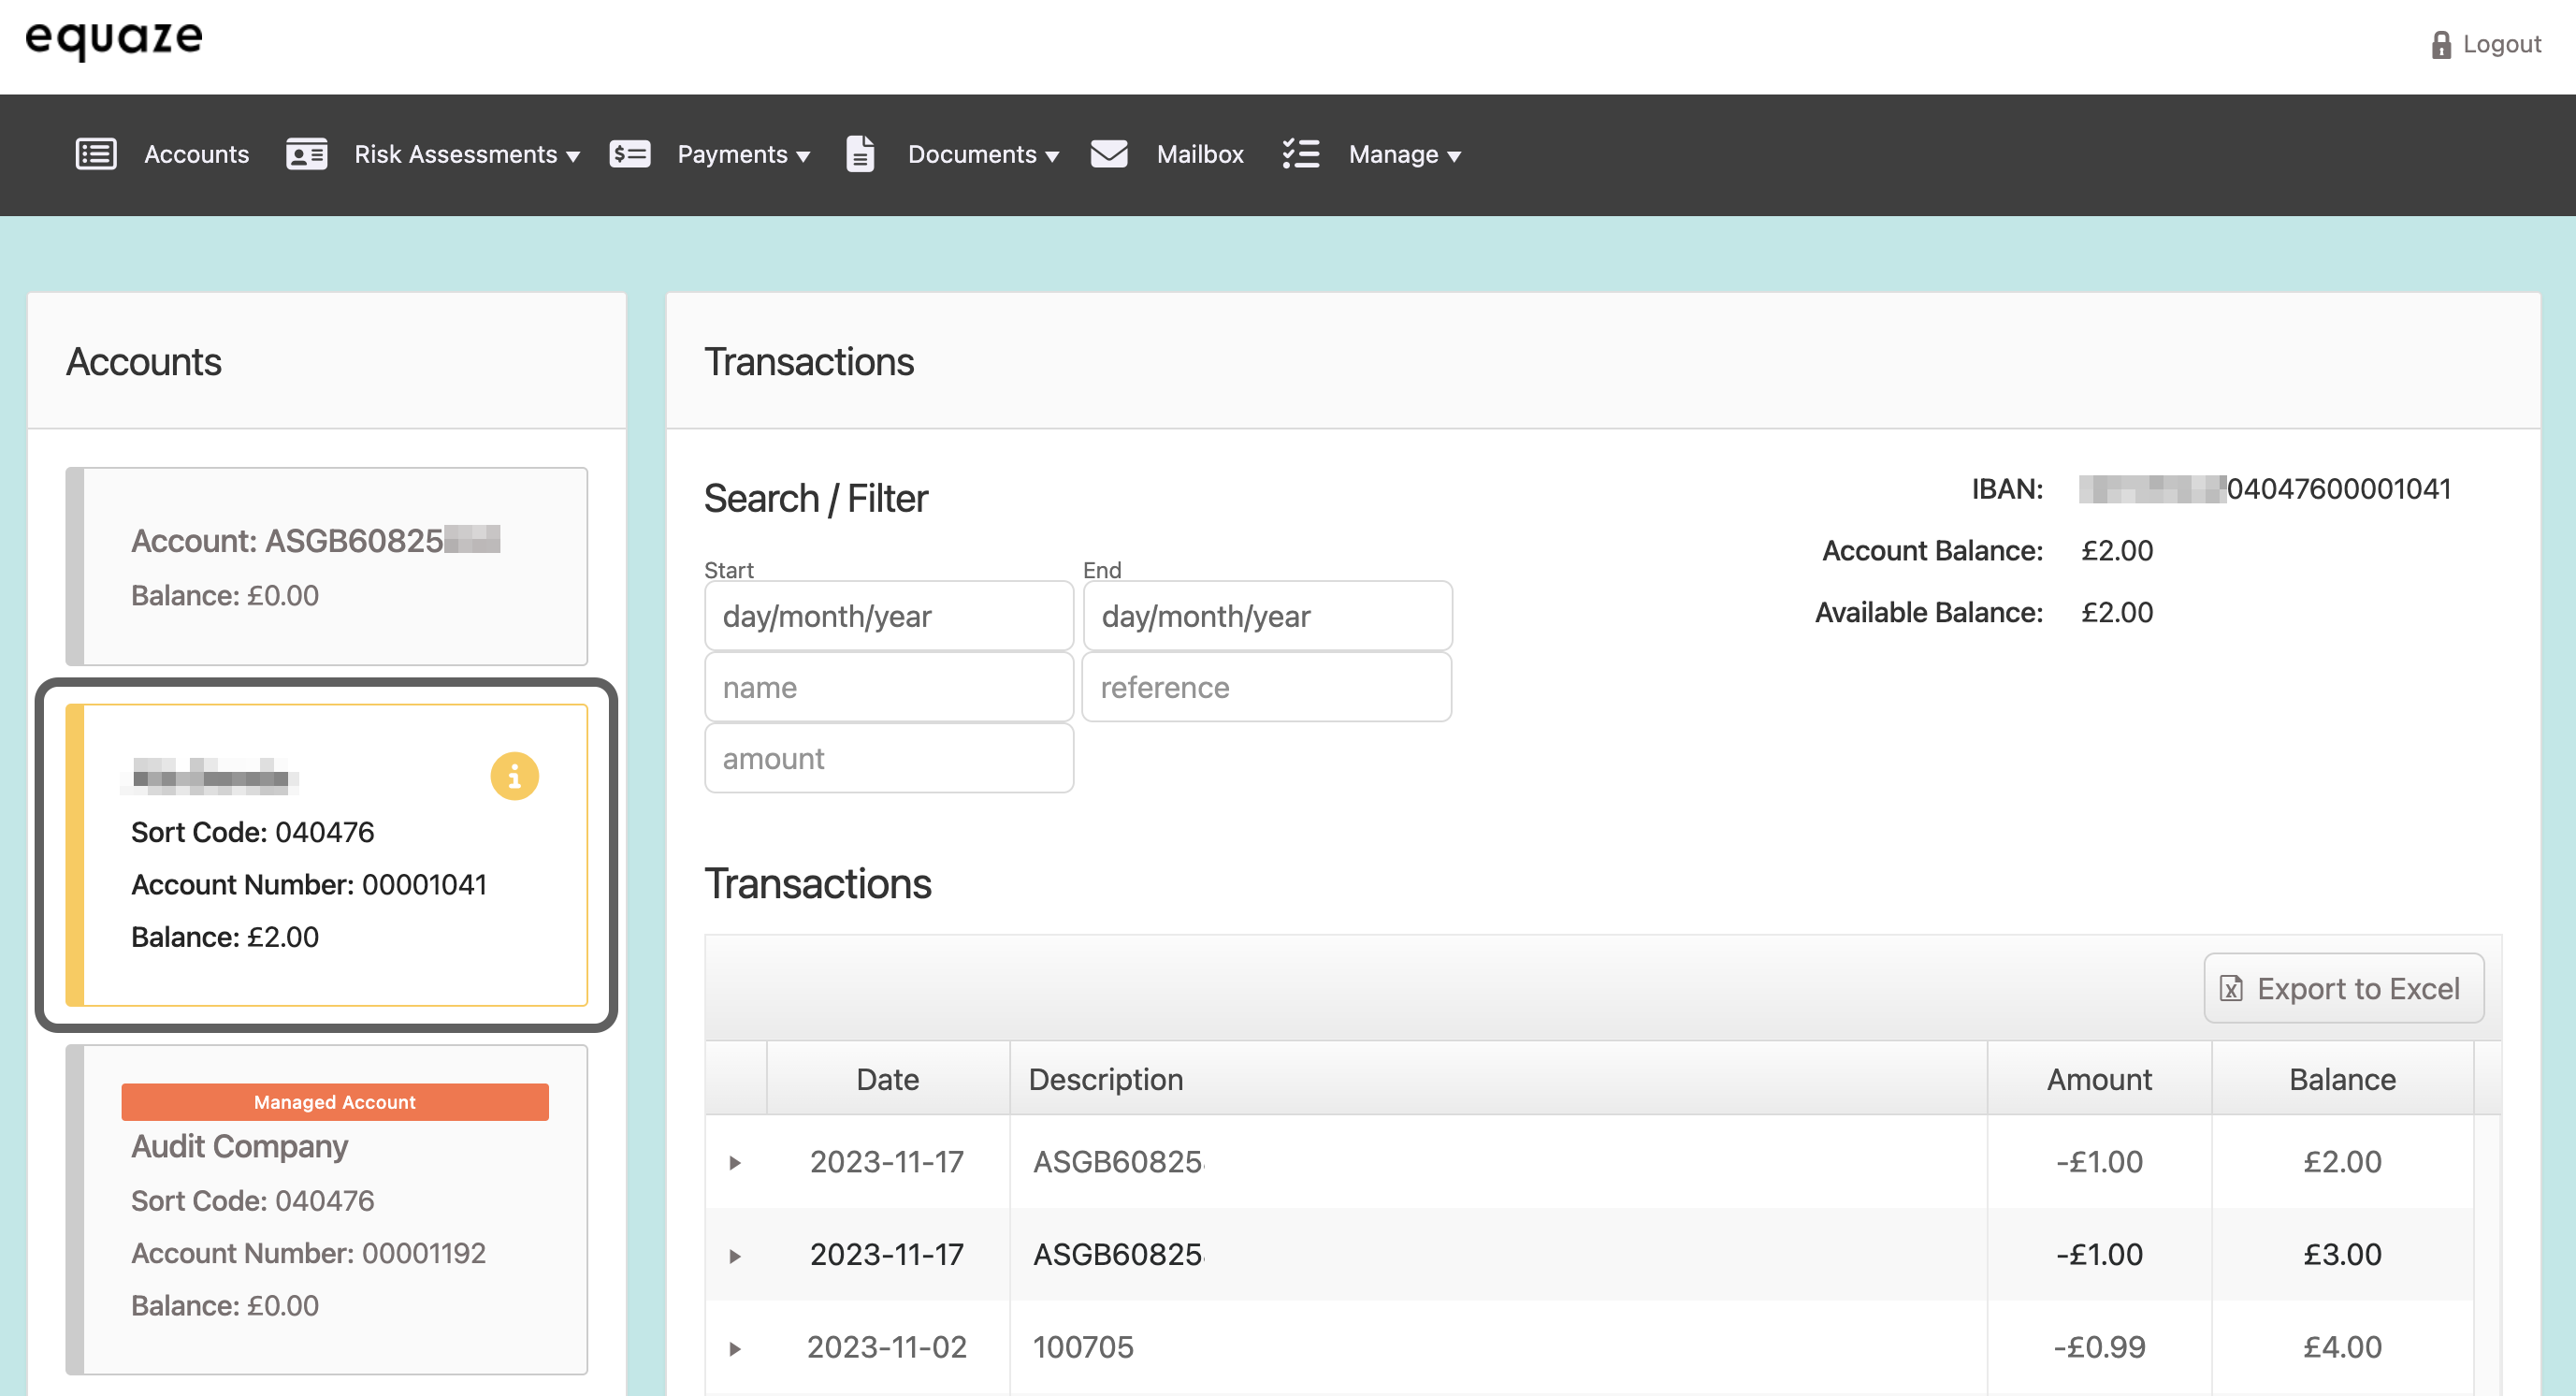
Select Account
On the account dashboard, navigate to the left side of the screen.
Identify and click on the specific account you want to export transactions for.
- The selected account should be highlighted with a distinctive yellow color.
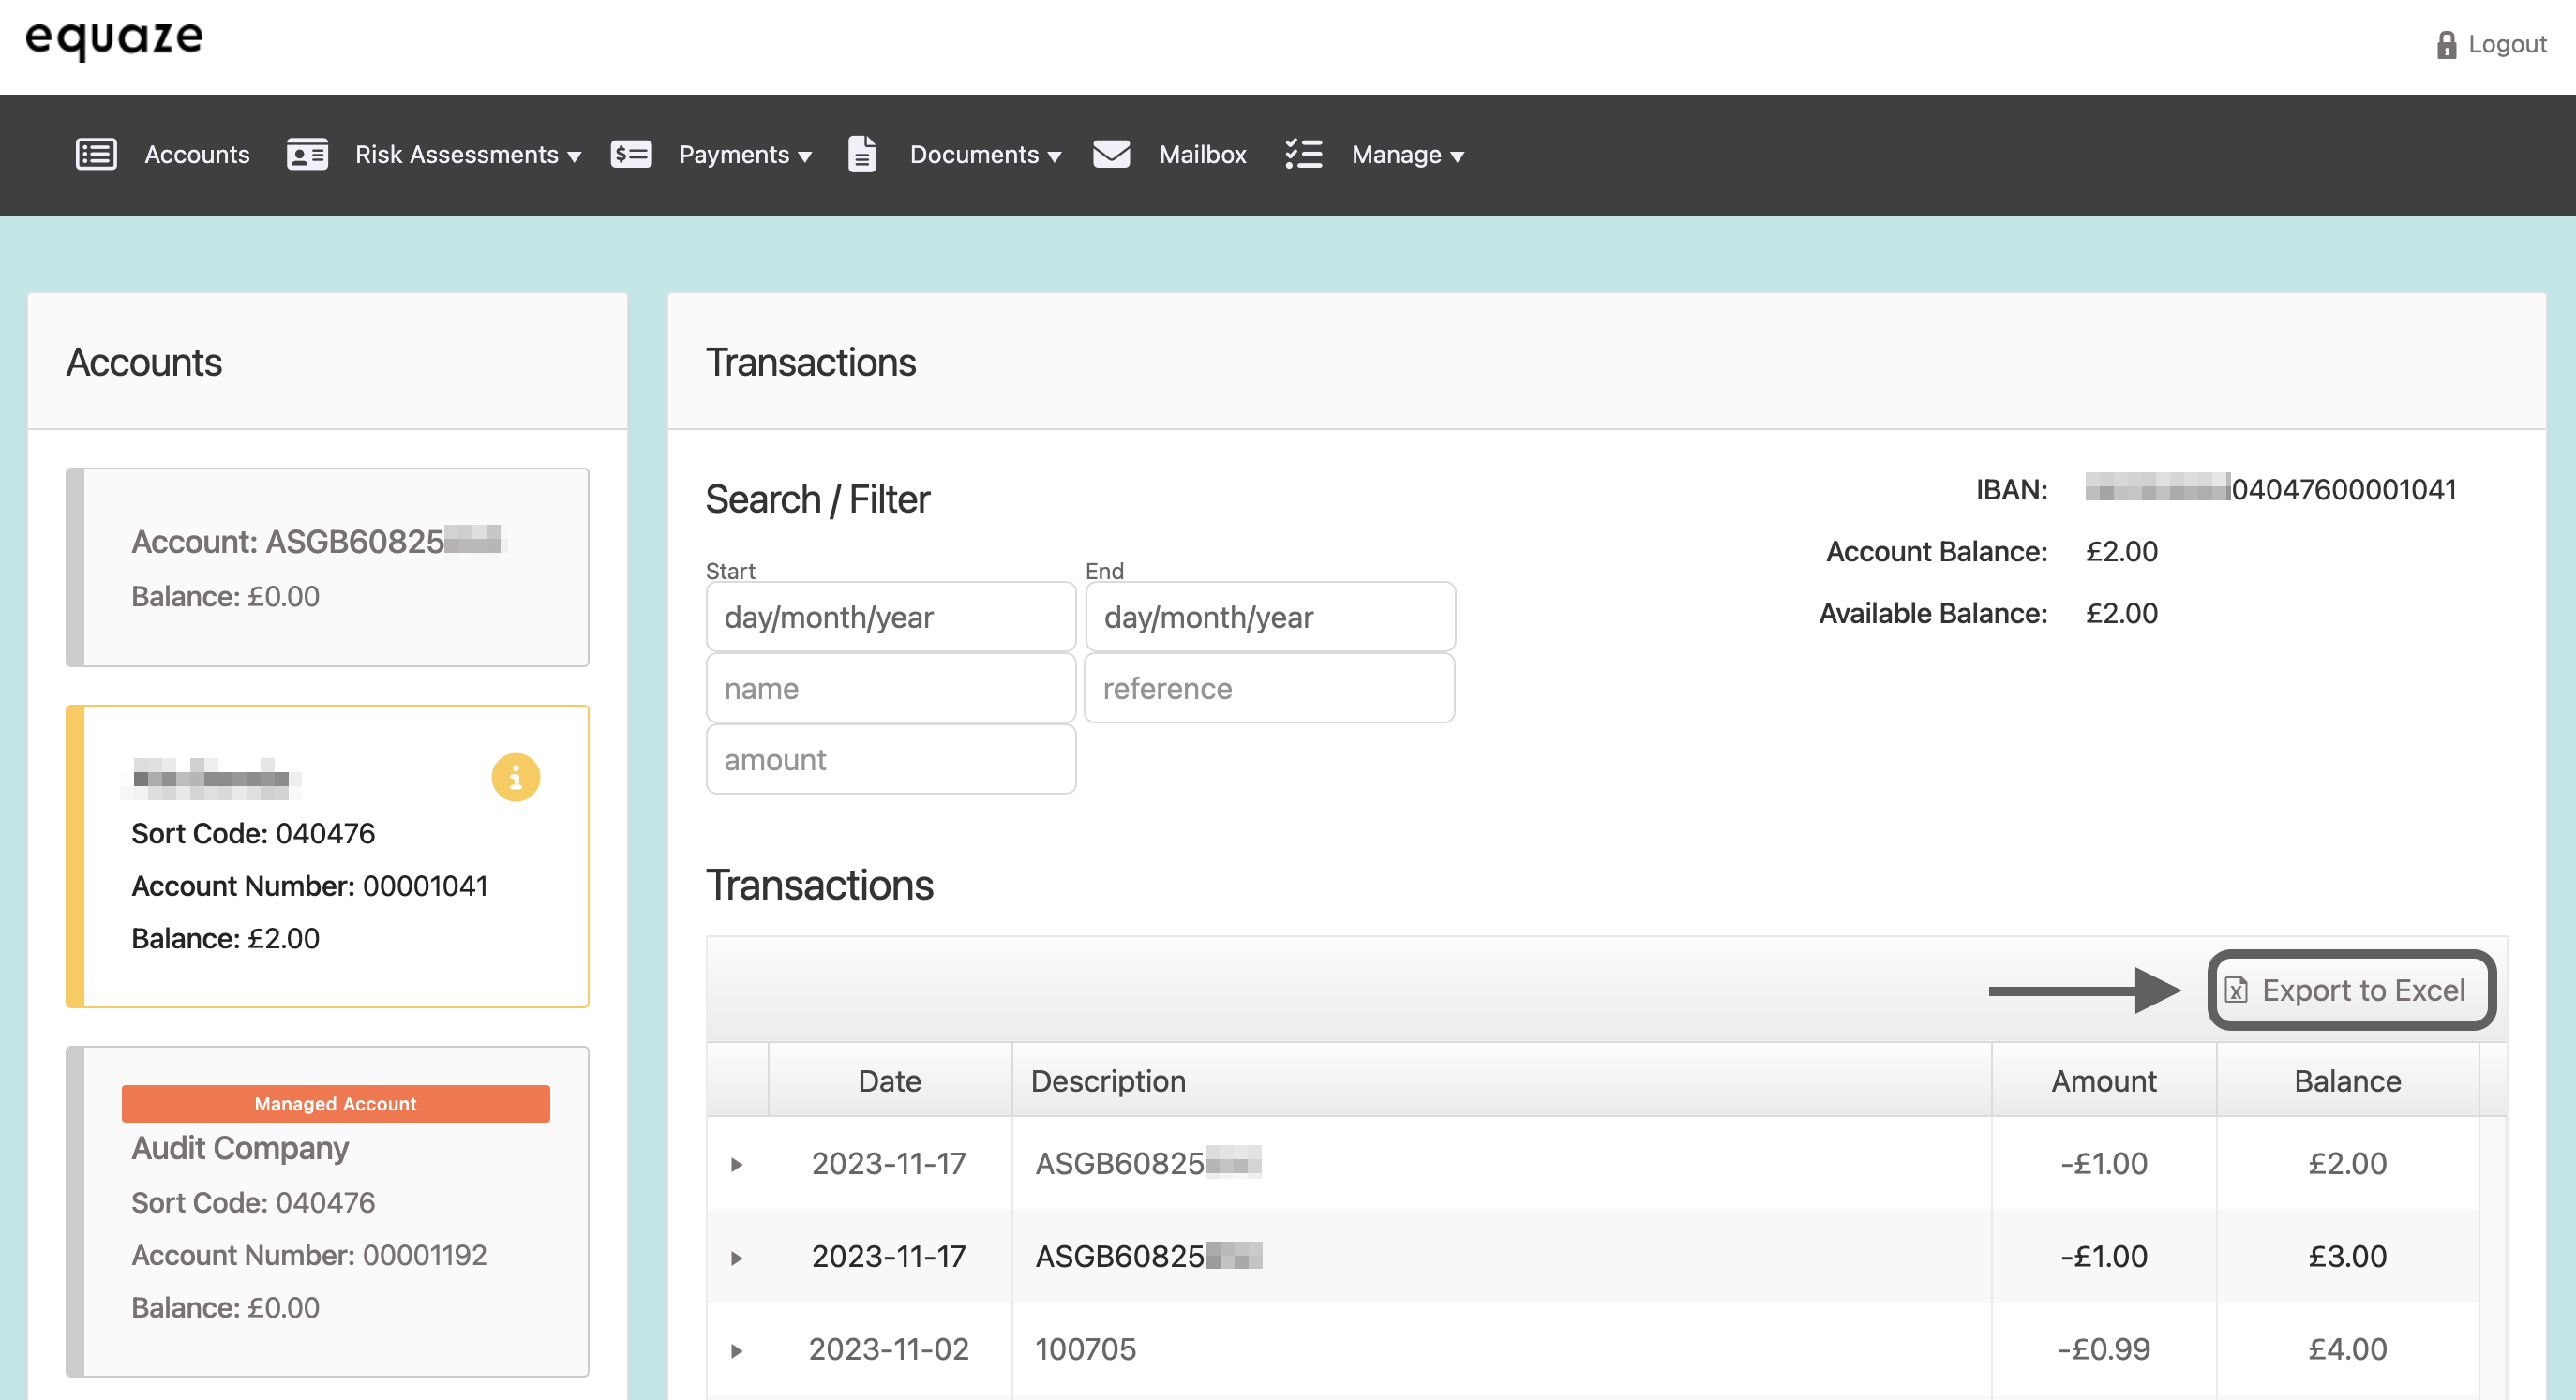
Access “Export to Excel” Button
Locate the “Export to Excel” button above the table displaying transactions information.
Click on the “Export to Excel” button to initiate the export process.
Confirm Download of Transactions Information
- Observe the system’s response and ensure the file with transaction information is successfully downloaded.
- The file should contain the expected transactions data.

Optional: Check Download Location
- If necessary, navigate to your computer’s download location or designated folder.
- Confirm that the downloaded Excel file is present and accessible.


