Set up a webhook
To create a webhook, select the options Manage > Webhooks in the menu first.
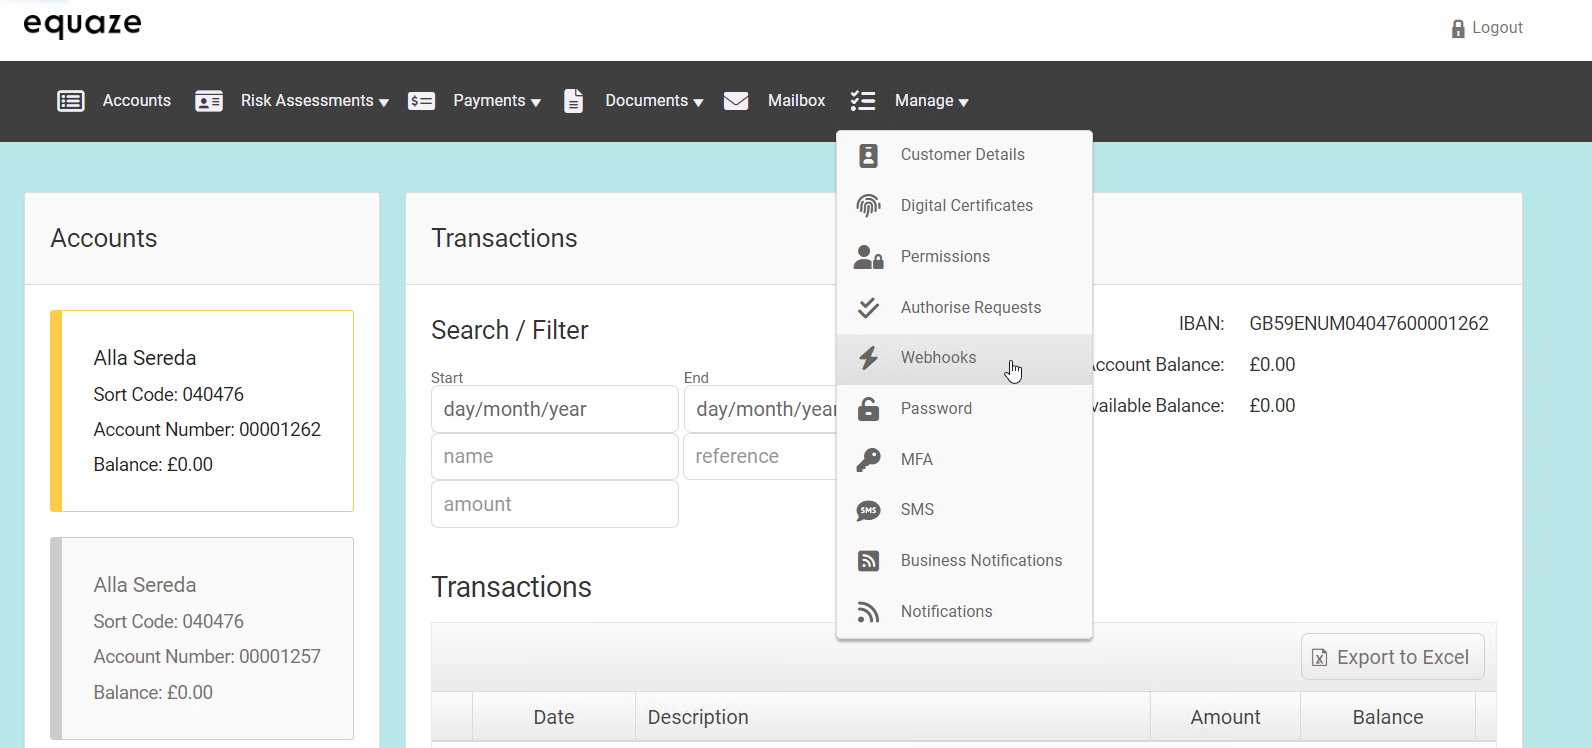
In the “Manage” section, click on the “Webhooks” dropdown menu item. This is where you can configure and manage webhooks for various functionalities. The Manage Webhooks is now opened.
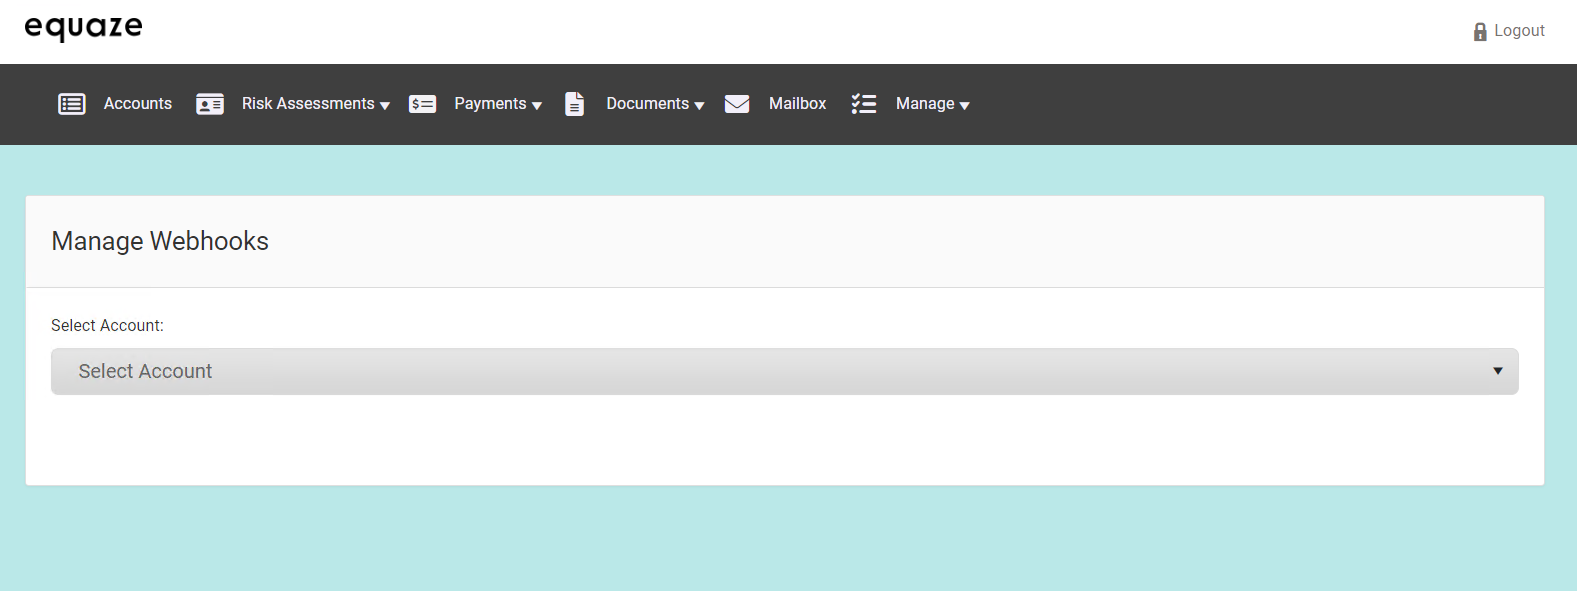
In the “Select account” dropdown, choose the account for which you want to set up a webhook. This specifies the context for the webhook.
To initiate Webhook Creation click on “Add Webhook” to start the process of creating a new webhook for the selected account. The Create Webhook page is now opened.
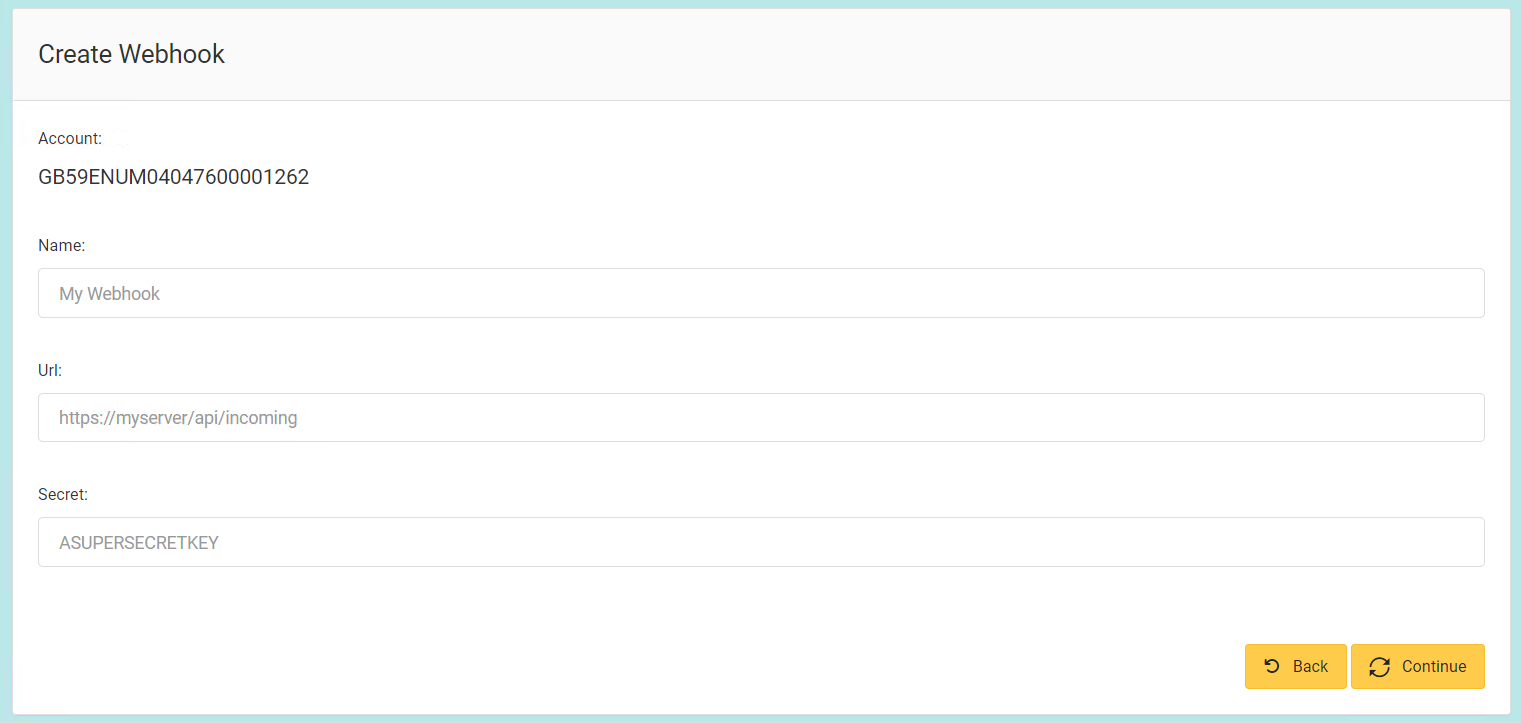
Provide a meaningful name for the webhook in the “Name” field. This aids in identifying the webhook easily later. Enter Webhook URL. Obtain the URL from Webhook.site and enter it into the “URL” field. This is the endpoint where the webhook events will be sent.
Optionally, for now, enter any secret key in the “Secret” field. This adds an extra layer of security to the webhook.
Click on “Send test webhook” to ensure that the webhook is correctly configured and can successfully communicate with the provided URL.
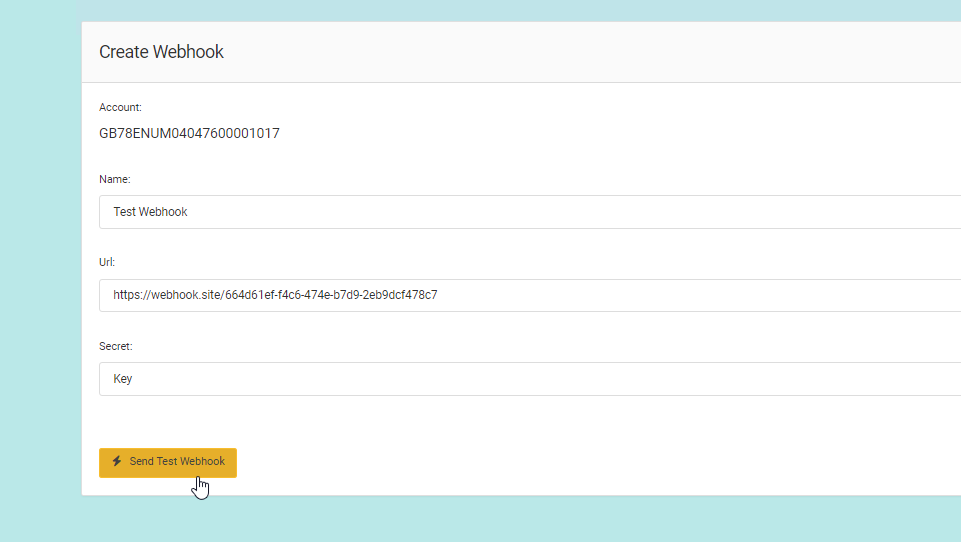
Check Webhook.site to confirm that the test webhook has been received and processed.
Once confirmed, click on “Continue” to proceed with the setup.
Initiate Money Transfer
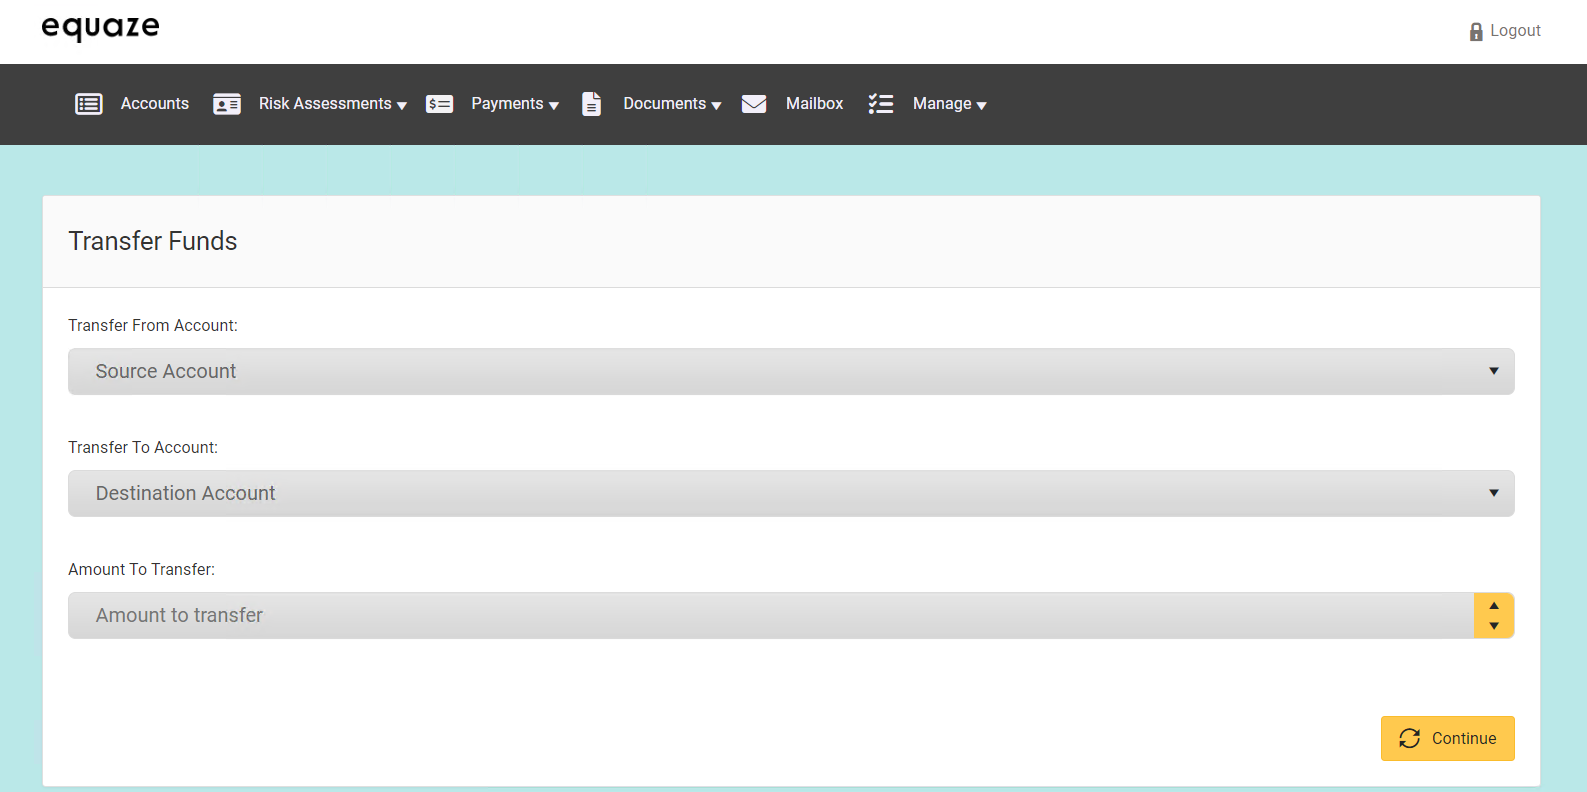
Navigate to “Payments” and choose the “Transfer Money” option.
Choose the account used previously to create the webhook in the “Transfer from account” dropdown.
Select another account to transfer money to from the available options.
Enter the amount you want to transfer and proceed by clicking on “Continue.”
Wait for the transfer to complete. This may take a moment depending on the system and network conditions.
Additionally, check Webhook.site to ensure that the transaction is recorded and that the webhook was triggered successfully.


