Prerequisites
Have a secure private key and a Certificate Signing Request (CSR) ready. These are essential for securing your digital identity.
Ensure you have access to the PKI sample file that you’ll be editing and updating.
Setting Up .NET (DotNet)
Download and Install .NET
- Start by downloading and installing .NET, a set of tools and libraries for building applications. Visit https://dotnet.microsoft.com/en-us/download to get the installer.
- Follow the installation instructions provided on the website.
Editing the PKI Sample File
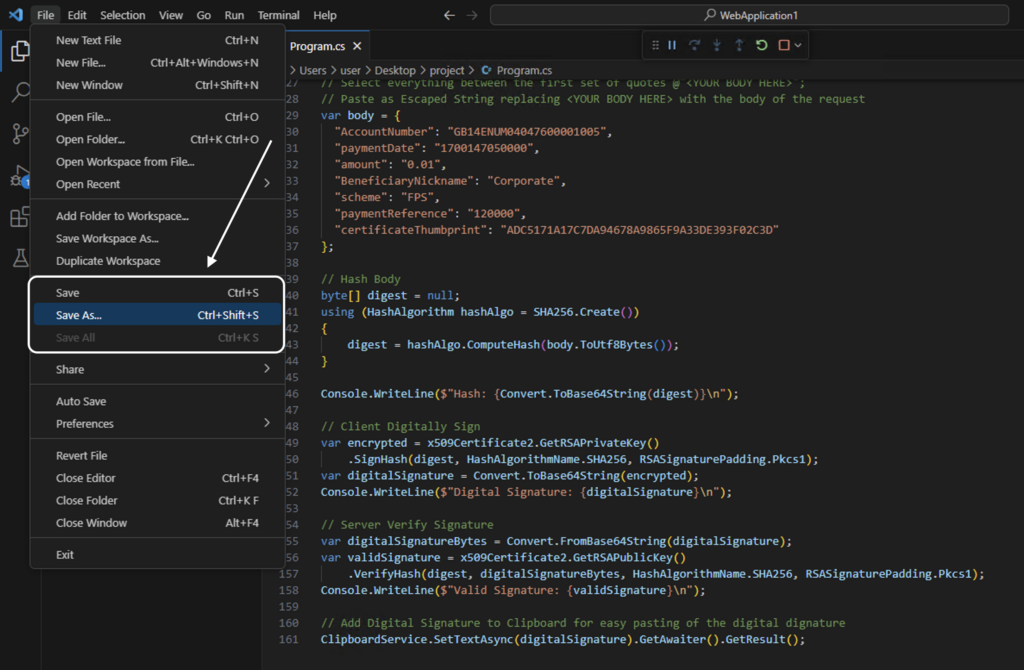
Open File in Visual Studio or Visual Studio Code
- If you don’t have Visual Studio or Visual Studio Code, these are development environments. Visual Studio is more feature-rich, while Visual Studio Code is lightweight and versatile.
- Open your PKI sample file using either Visual Studio or Visual Studio Code.
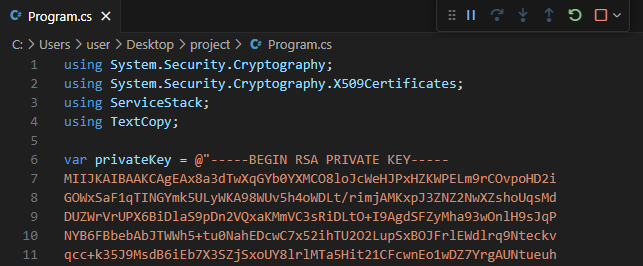
Replace Private Key
- Locate the existing private key in the file. This key is like a secret password. Replace it with the newly generated secure private key. Ensure that this private key is kept confidential and secure.
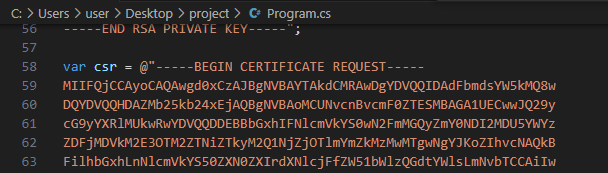
Replace Certificate Request (CSR)
- The certificate request (CSR) is like a formal request for a digital certificate. Replace the old one in the file with the newly generated Certificate Signing Request (CSR). This request is crucial for obtaining a valid digital certificate.
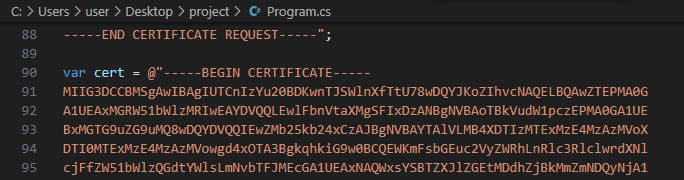
Paste Certificate
- After submitting your CSR, you’ll receive a digital certificate. Paste this certificate into the file. Think of it as receiving an official stamp of approval for your digital identity.
Paste Body from GET Request
- Simulate a request for information from the server by using a GET request to https://api.sim.enumis.co.uk/onlineaccount-api/send/api.
- Copy the information (body) received from the server and paste it into your PKI sample file. Use a method called “Paste as escaped string” to ensure proper formatting.
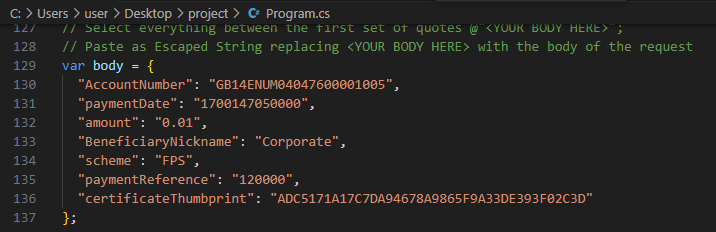
Save the File
- Save the changes made to the PKI sample file. This ensures that the file now contains the updated information necessary for creating the digital signature.
Generating the Digital Signature
Using Command Prompt/Terminal
Specify File Location
- Open the command prompt or terminal. Think of it as a text-based interface to communicate with your computer.
- Navigate to the location of the PKI sample file using the
cd "FileLocation"command. This tells the system where to find the file.

Run the .NET Application
- Type the command
dotnet runand press Enter. This command runs the .NET application, triggering the process of creating the digital signature.
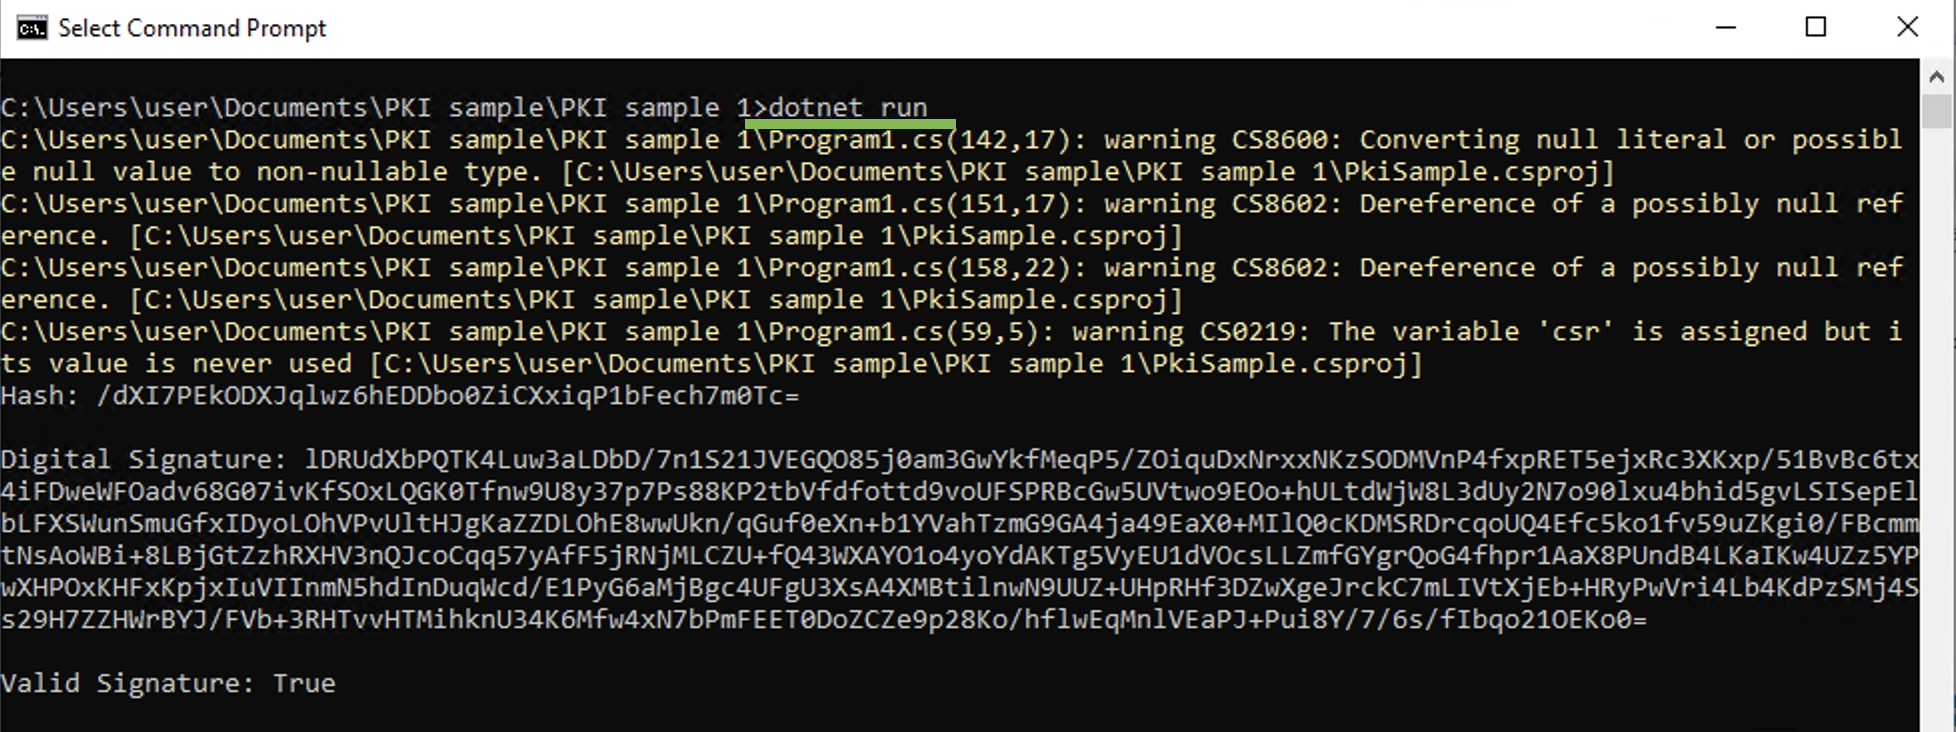
Copy the Digital Signature
- After the command completes its execution, you’ll see the generated “Digital signature” in the output. Copy this digital signature. Consider it as a unique identifier for your transaction.
By meticulously following these steps, you’ve successfully edited the PKI sample file and created a digital signature using .NET. Remember to safeguard your private key and digital signature as they play a crucial role in ensuring the security of your digital transactions.
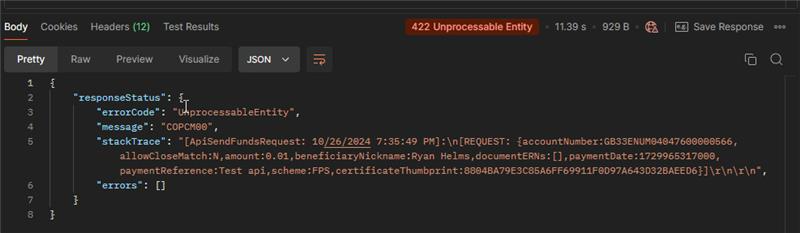
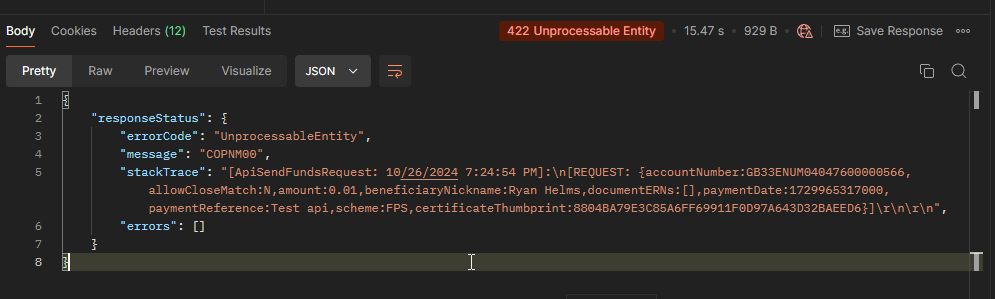
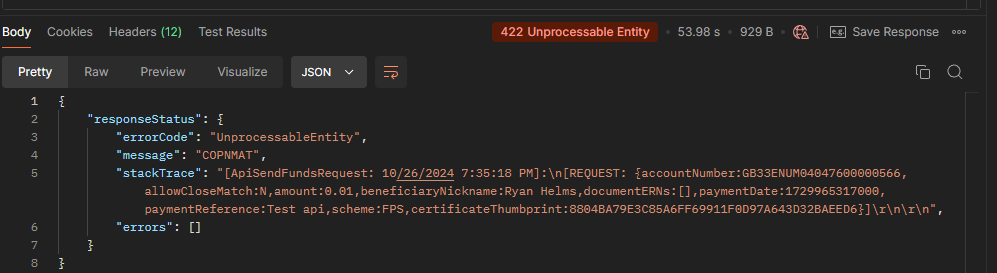
Confirmation of Payee error return
These are errors you will get if Confirmation of Payee failed (with HTTP ERROR 422):
COPNM00: Not Match
COPNMAT: Not Match because account type of the beneficiary is wrong (Personal/Business)
COPCM00: Close Match if you did not put “allowCloseMatch”: “Y” when requesting to send fund